Pick a skill. Master it.
Every course focuses on one technique and takes you from first stroke to finished piece.
 Free
Free
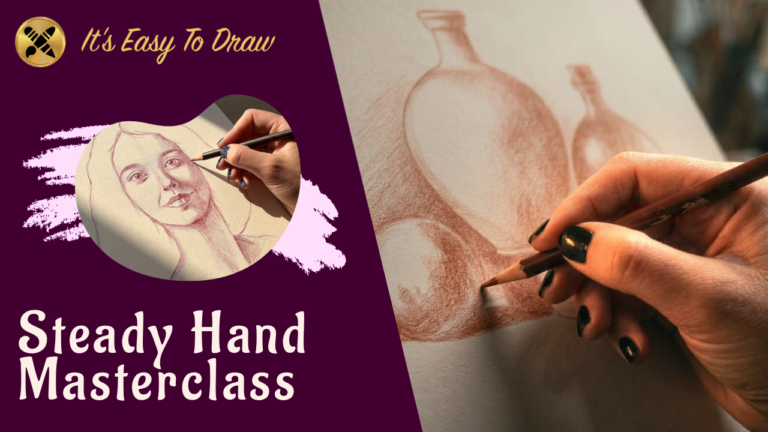
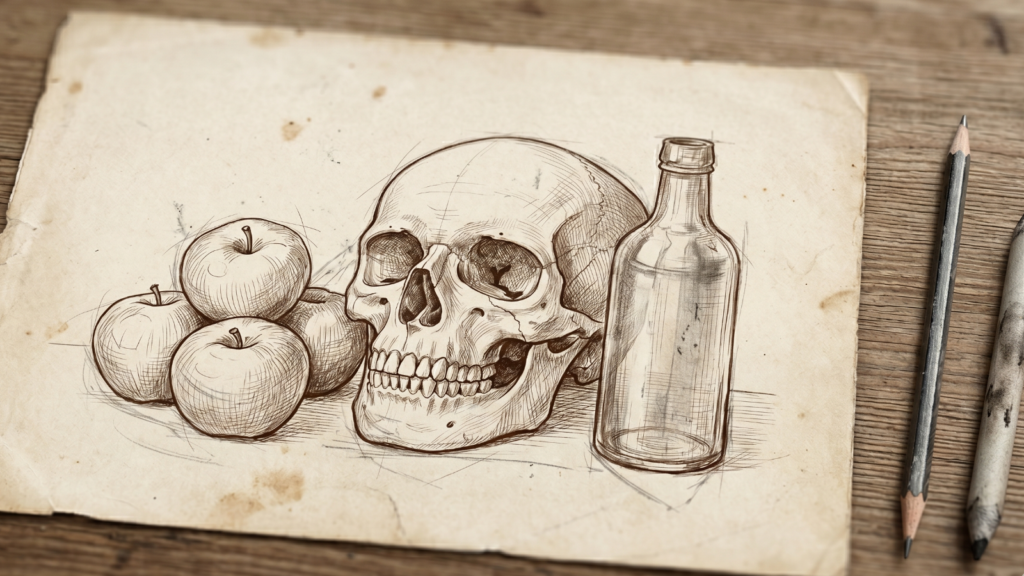
Build the pencil control and observation skills that make everything else possible.
 $199
$199
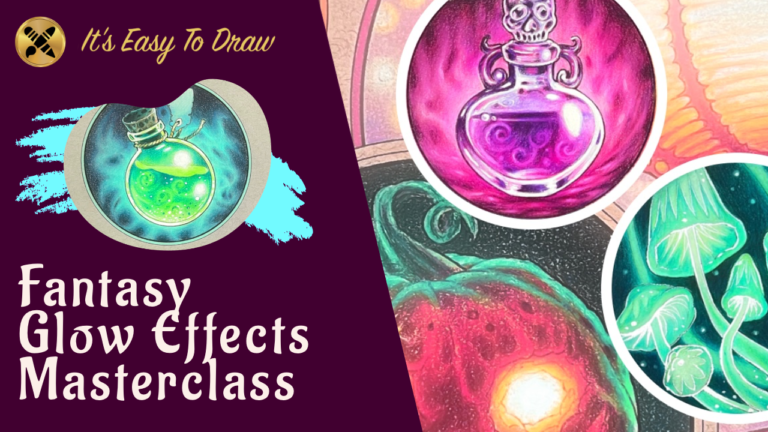
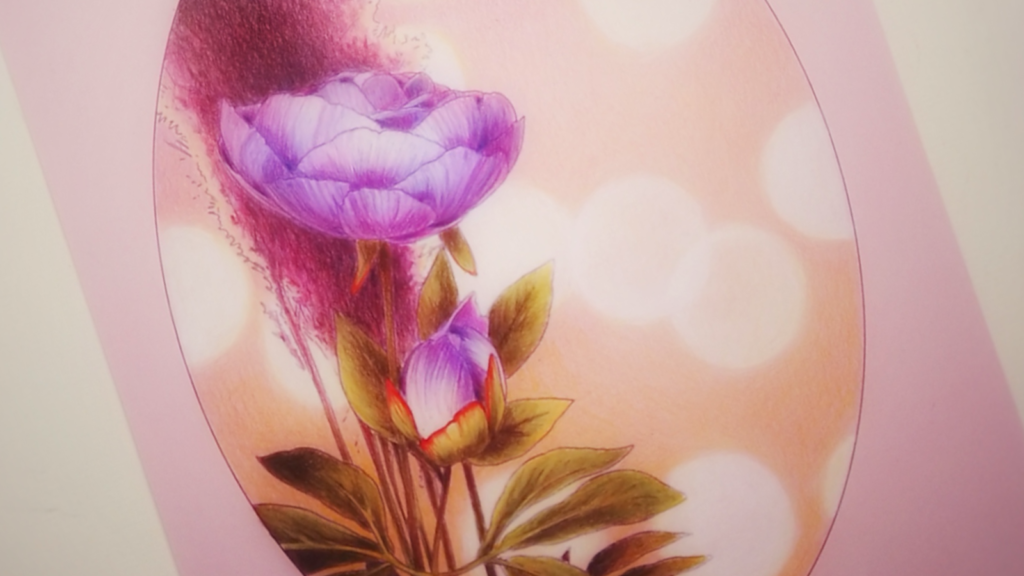
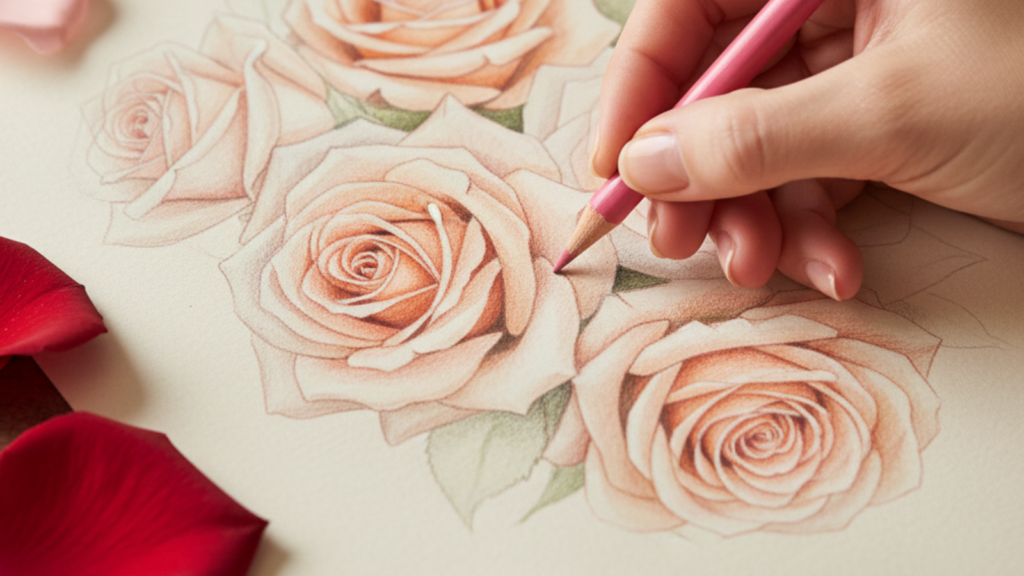
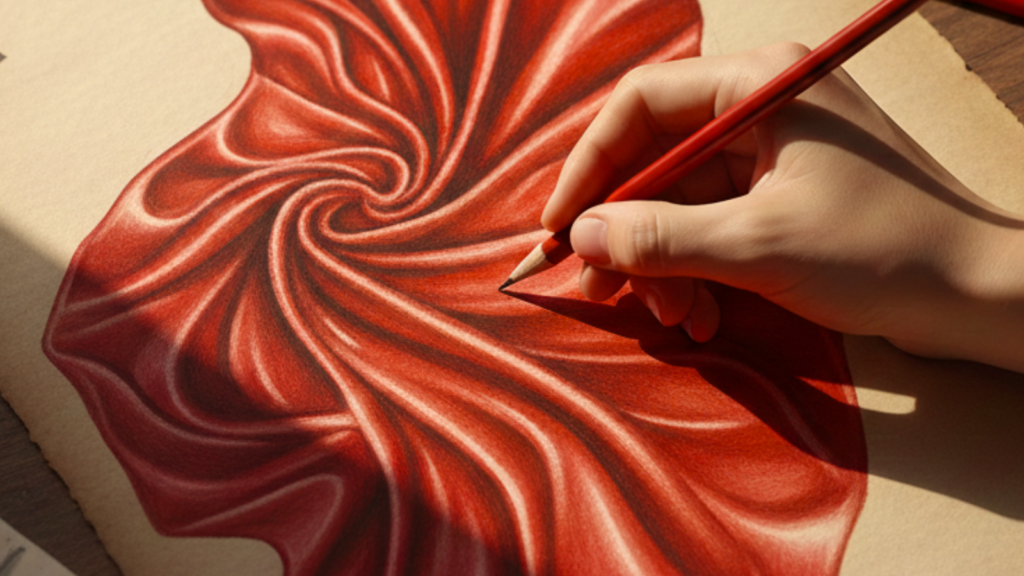
Master the colored pencil techniques that make light glow on paper.
 $199
$199
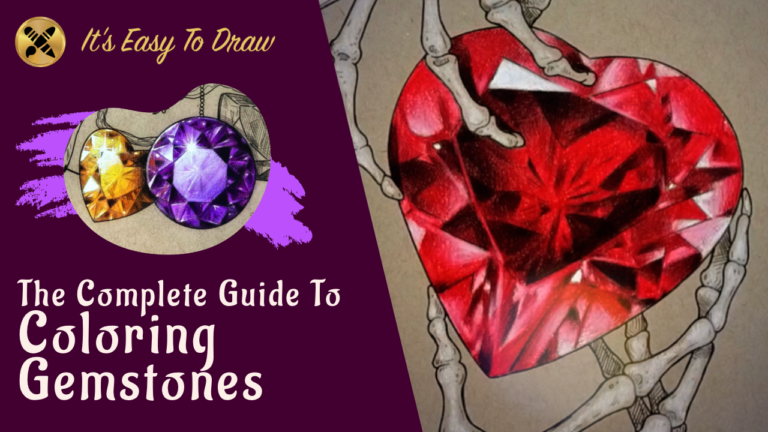
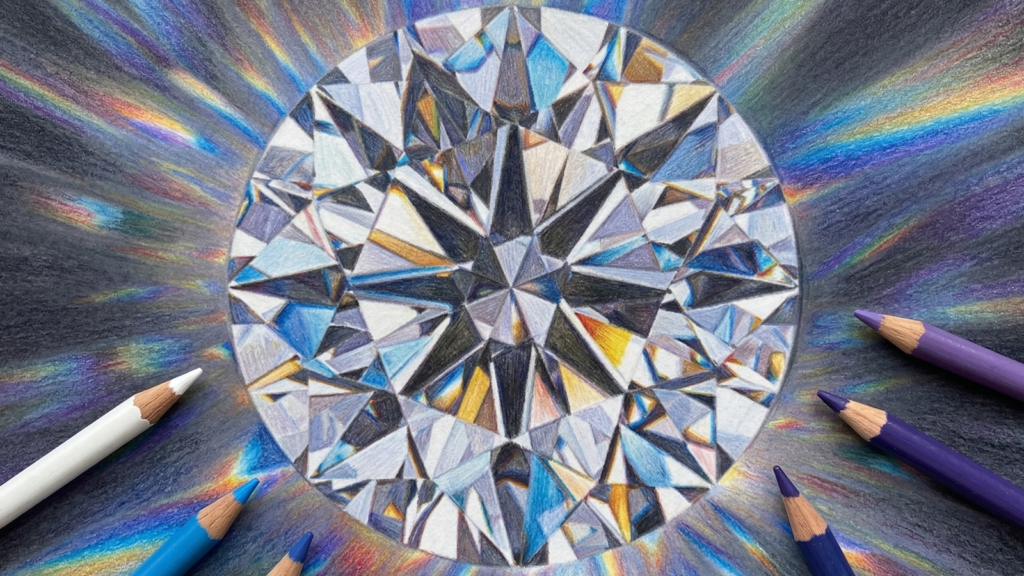
The most comprehensive colored pencil gemstone course available.
 $199
$199
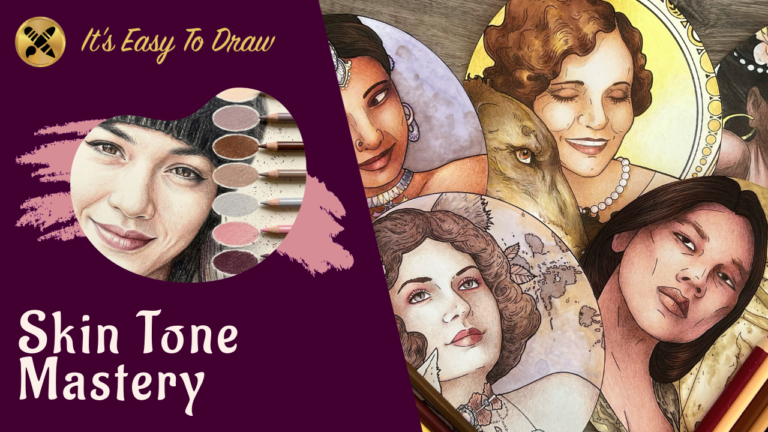
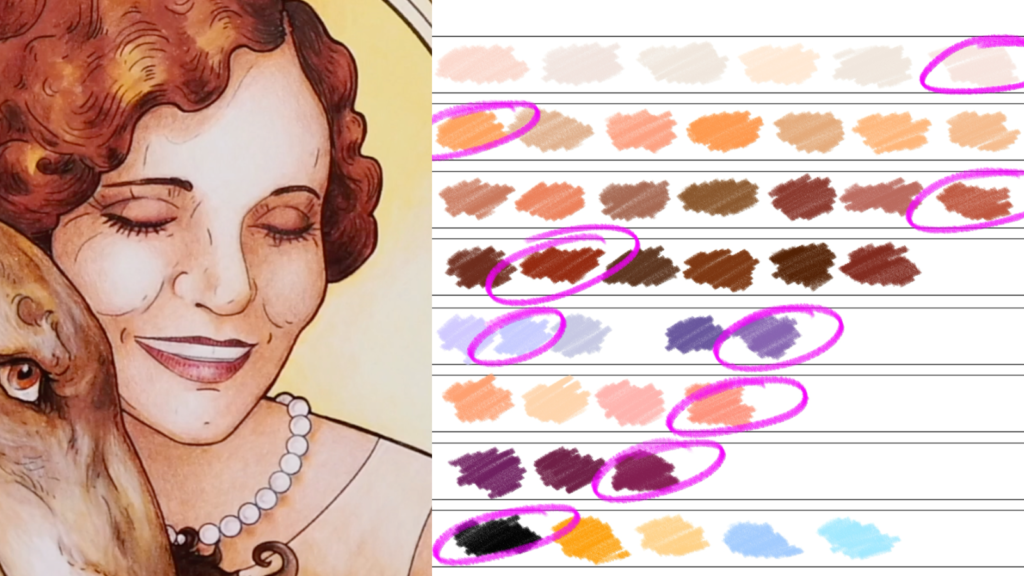
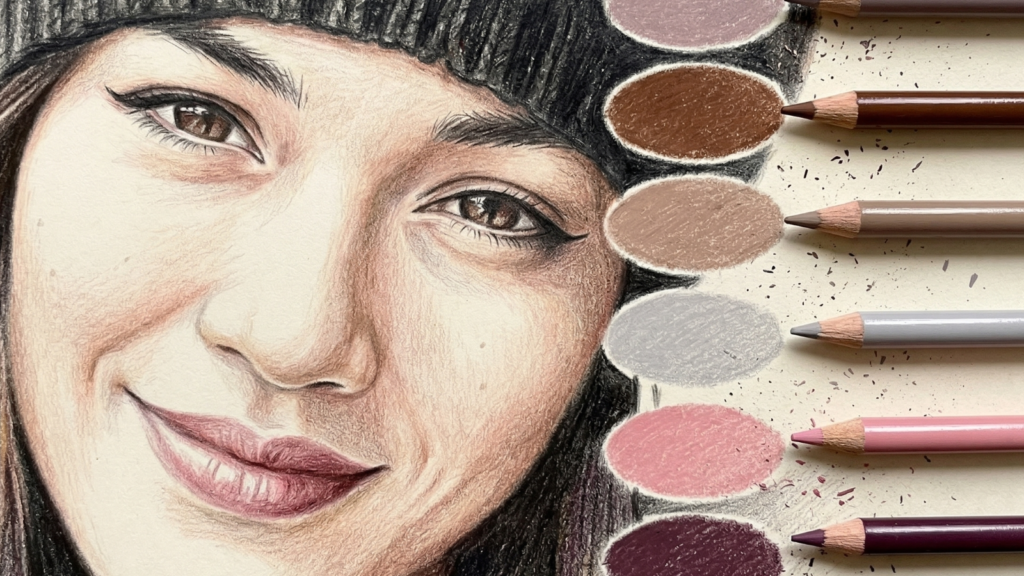
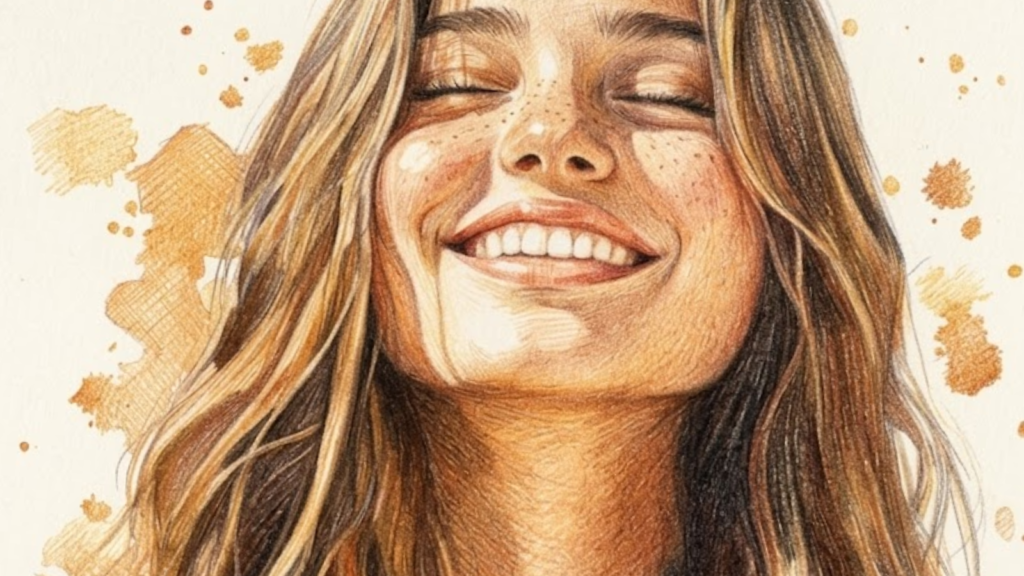
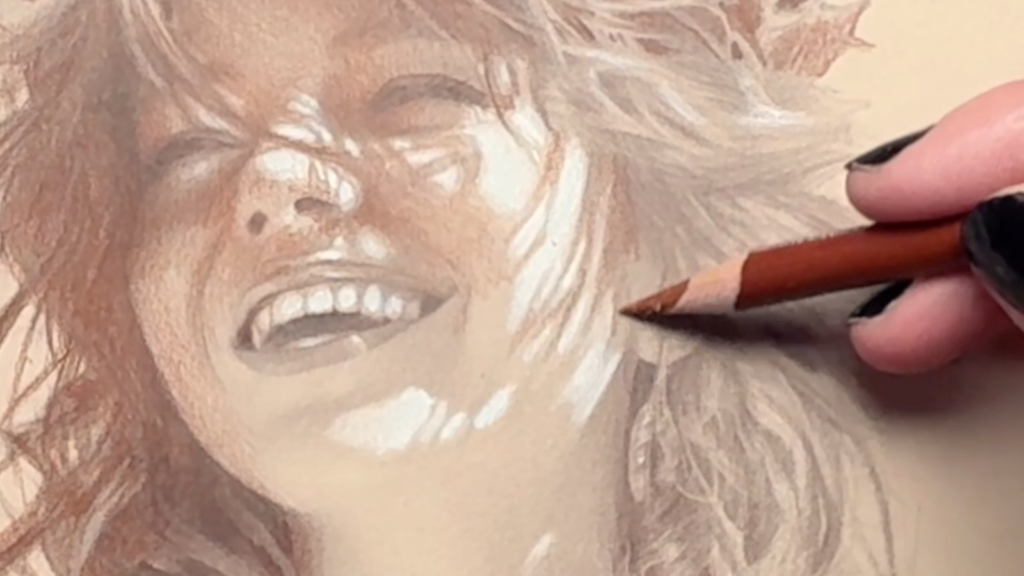
Five complete skin tone systems from first pencil to final detail.
 $199
$199
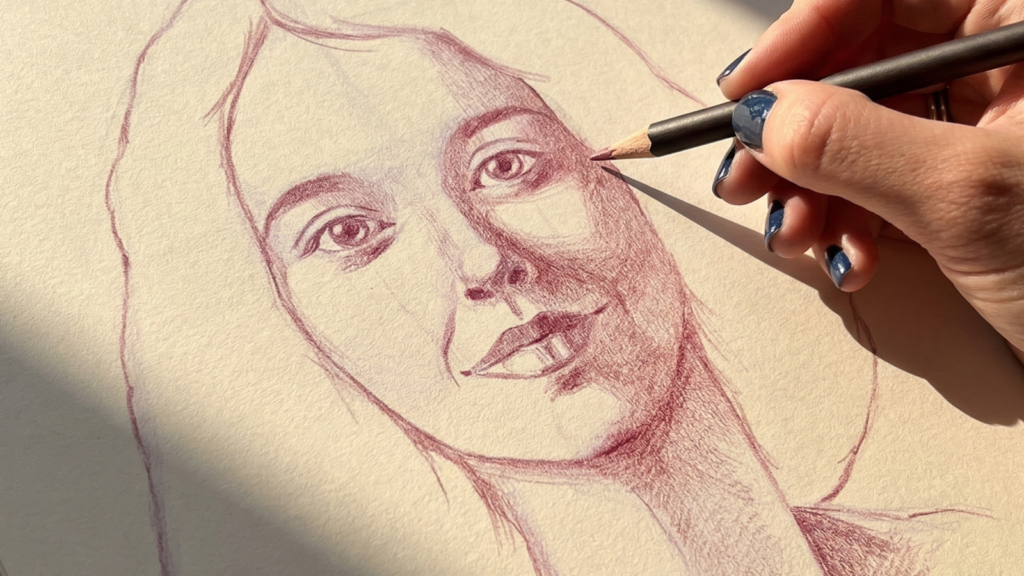
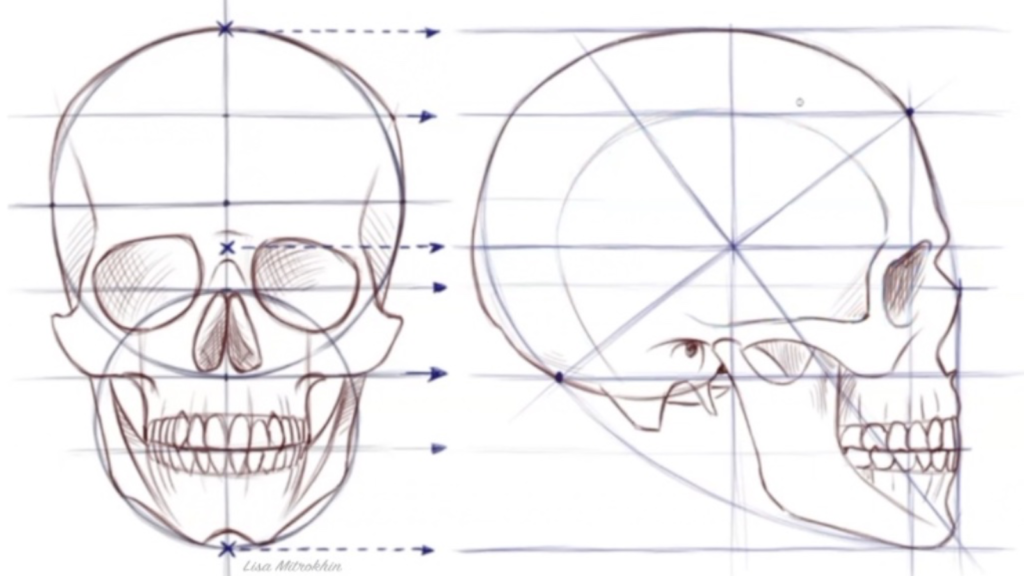
Break portraits down into geometry, angles, and steps you can follow.
 $199
$199
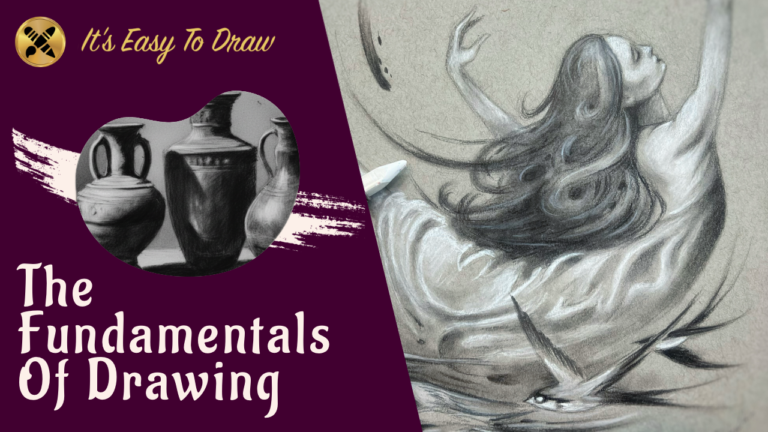
The foundation that every other drawing skill depends on.
 $199
$199
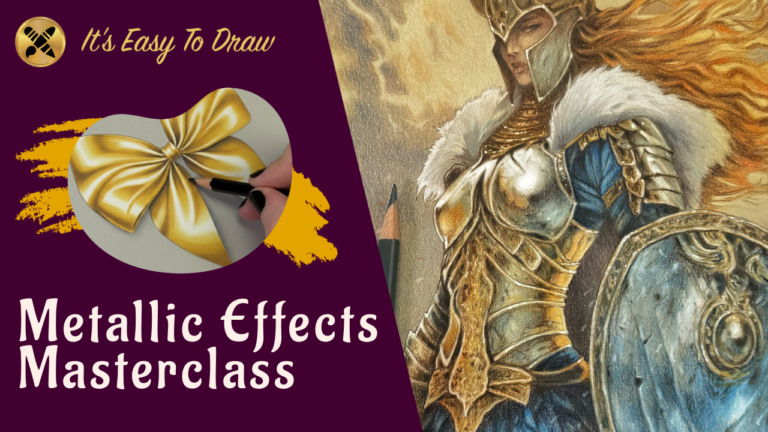
Gold, silver, copper, bronze, pewter, iron, rust. Every metal, every texture.
 $199
$199
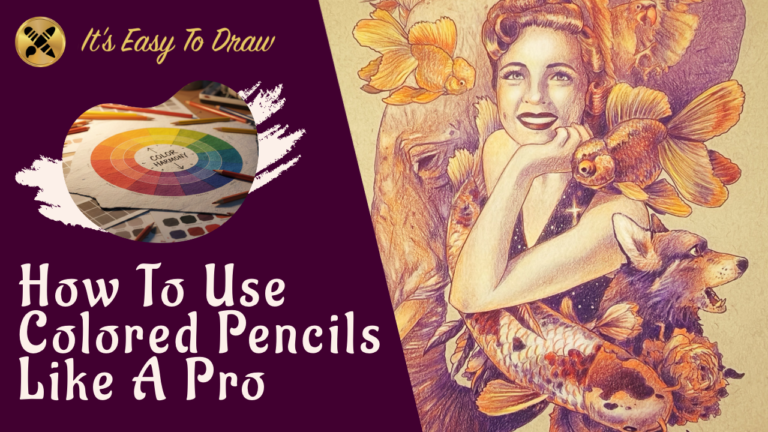
The complete colored pencil foundation, from first stroke to finished project.
 $199
$199
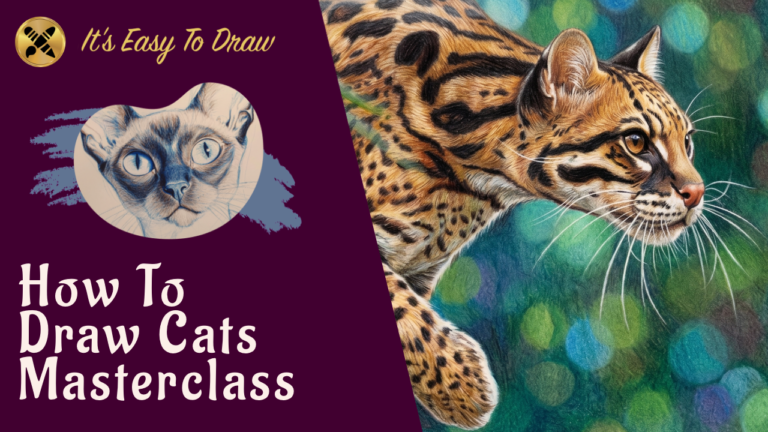
From house cats to lions. Anatomy, fur, and realistic detail.
 $159
$159
Twinkle lights, bokeh, and neon glow. Three ways to make light on paper.
 $159
$159
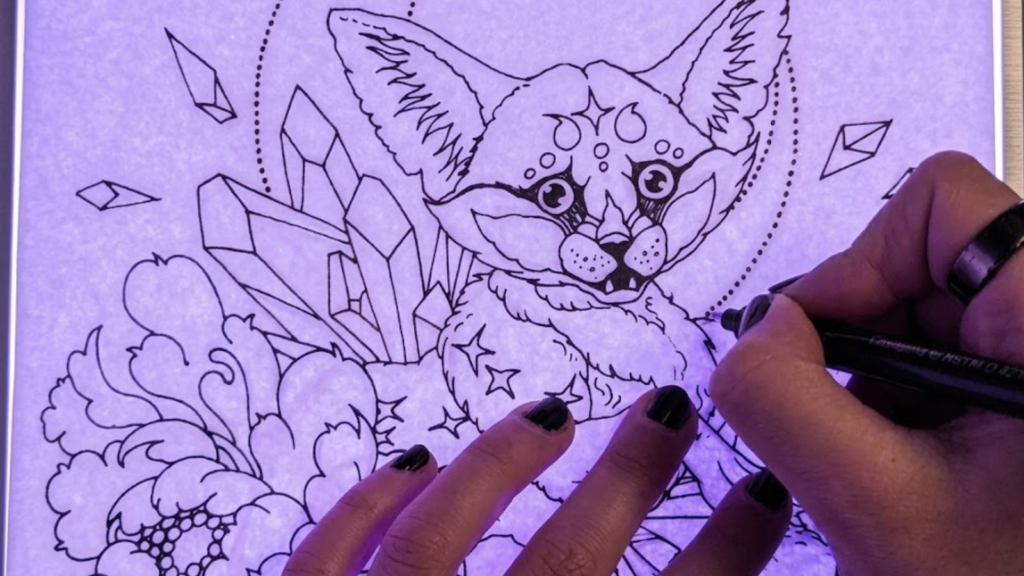
From first sketch to a finished coloring page ready for print or Etsy.
 $99
$99
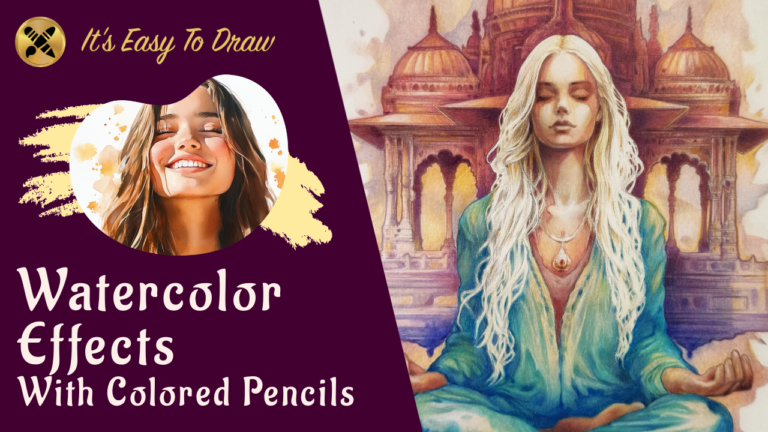
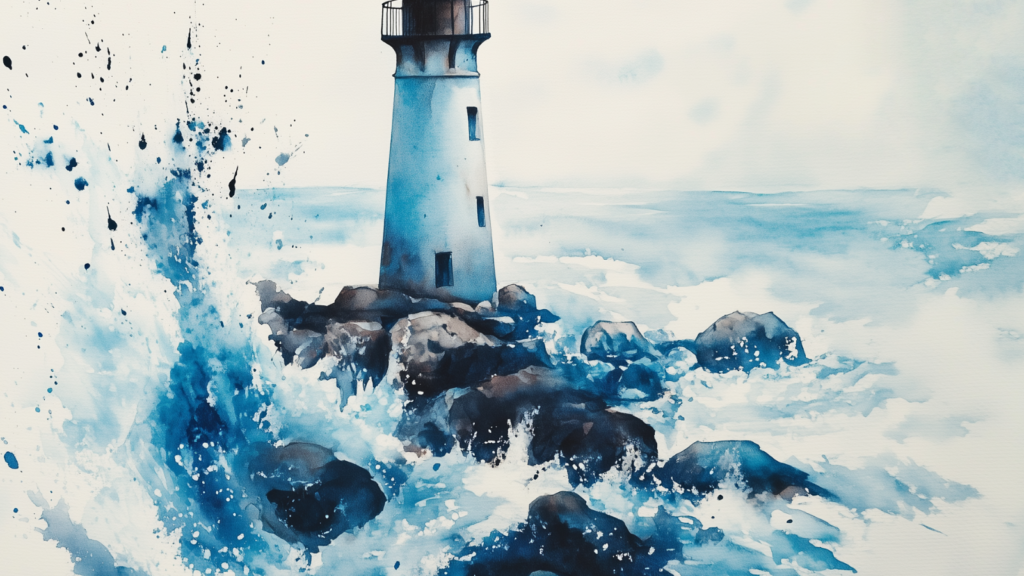
Achieve the watercolor look using only colored pencils. No water needed.
 $99
$99
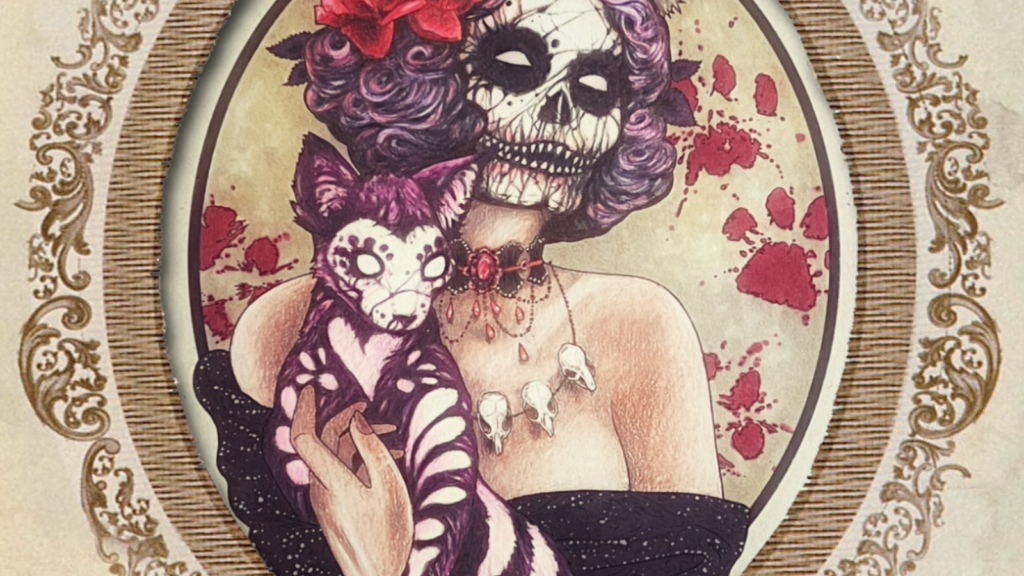
Skulls, undead skin, gothic jewelry, and glitter. One dark, detailed project.
 $99
$99
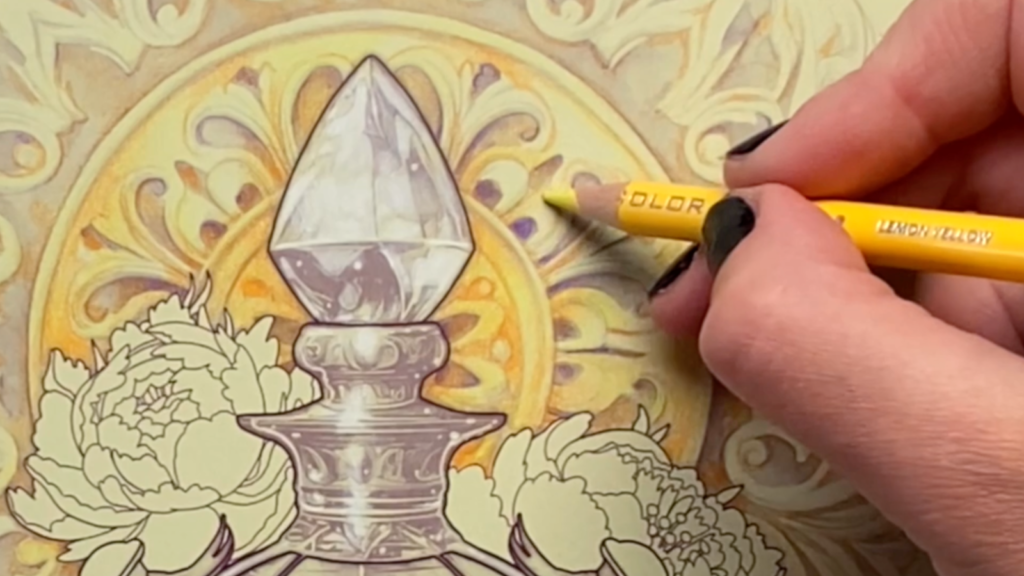
Make colored pencils look like light passing through glass.
 $99
$99
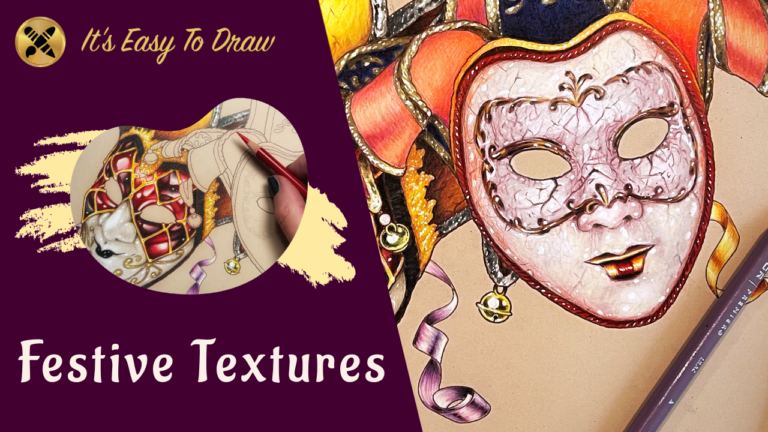
Golden fabric, velvet, porcelain, enamel, satin, and more. Two ornate masks.
 $99
$99
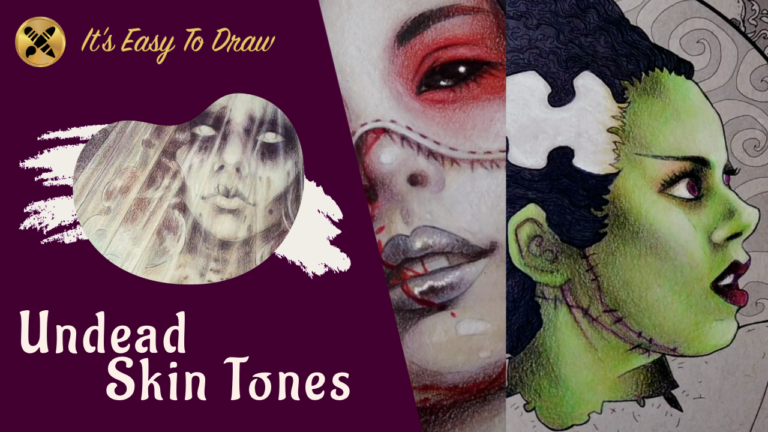
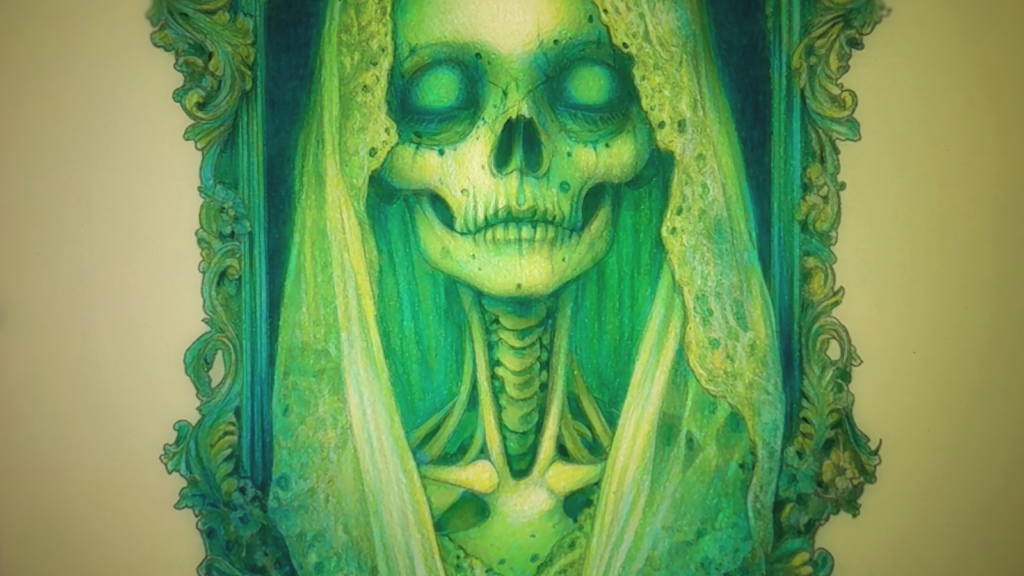
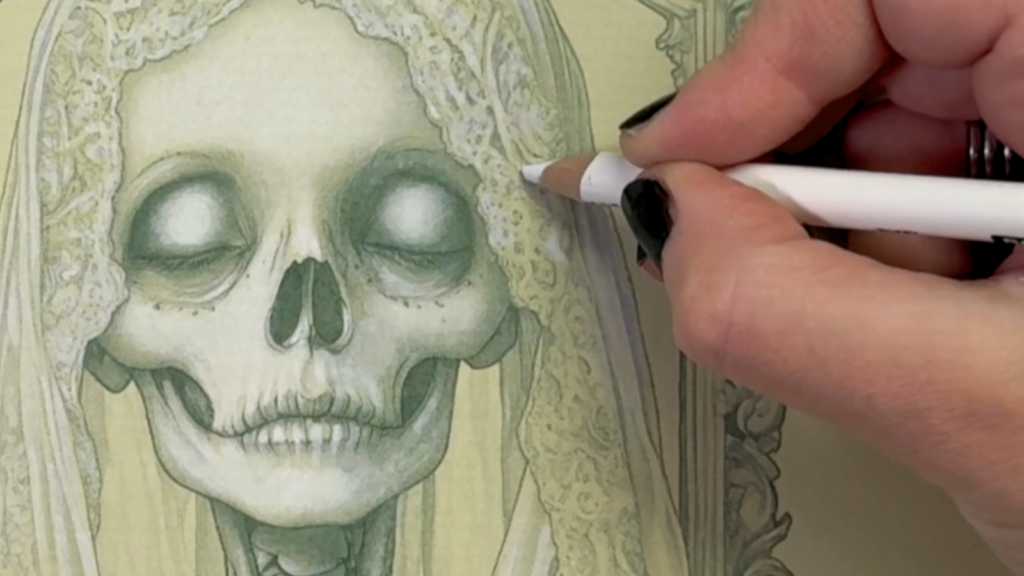
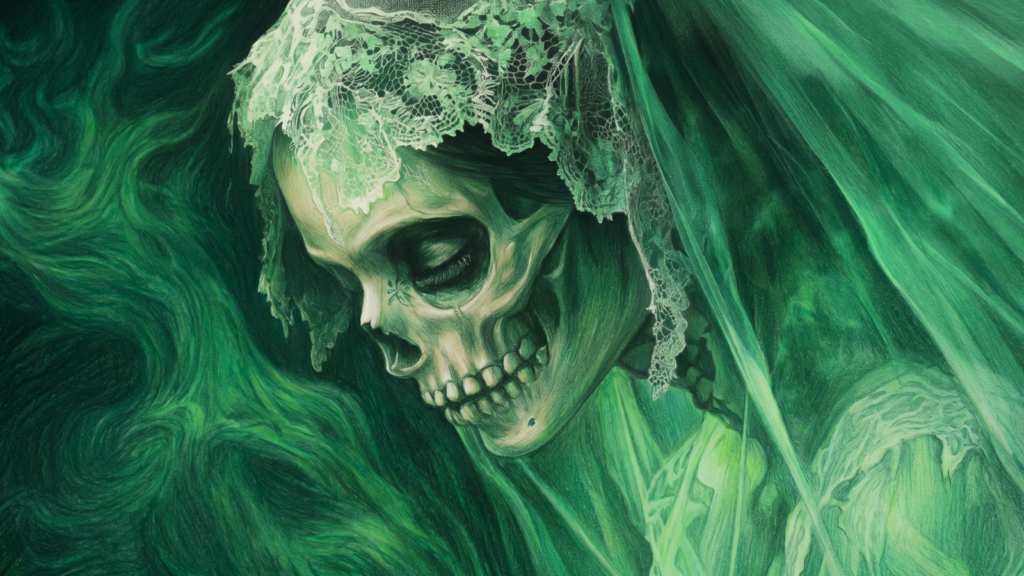
Ghost bride, demon girl, green skin. Three undead characters, three techniques.
 $99
$99
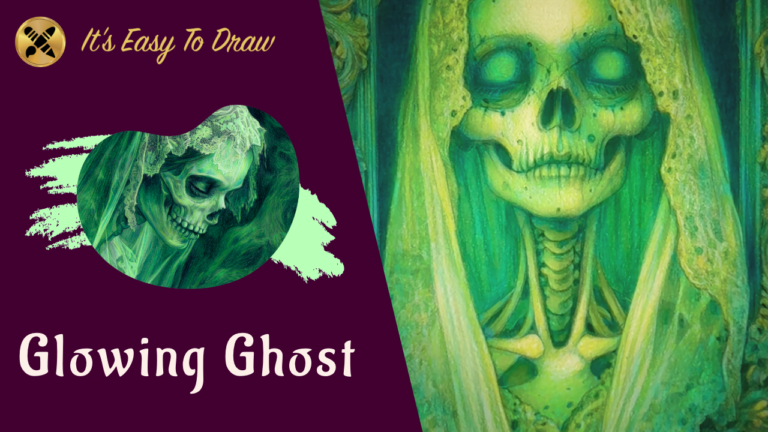
One ghost, one glow. A complete follow-along project.
 $99
$99
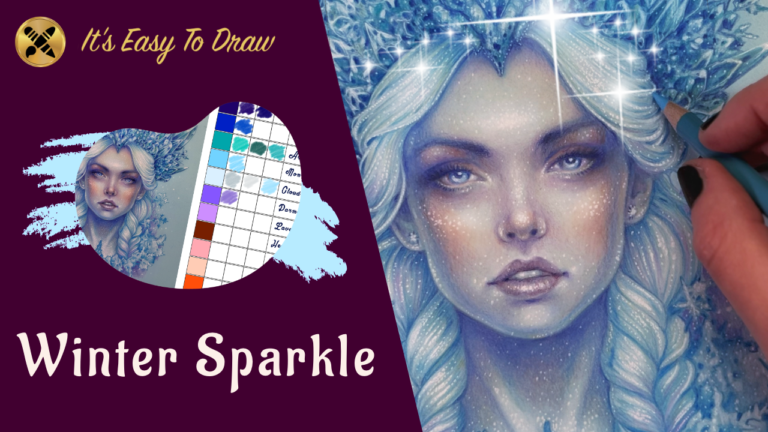
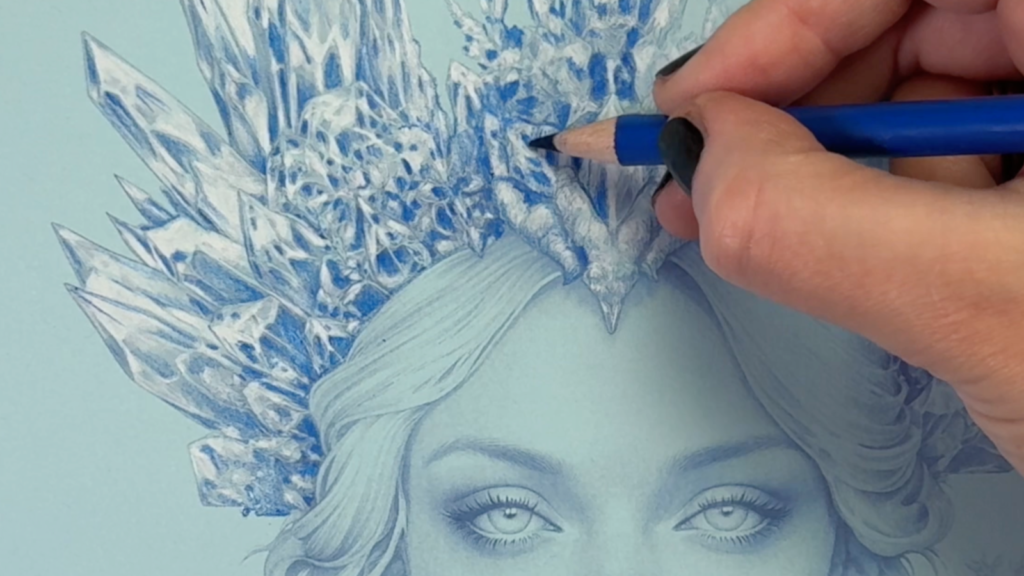
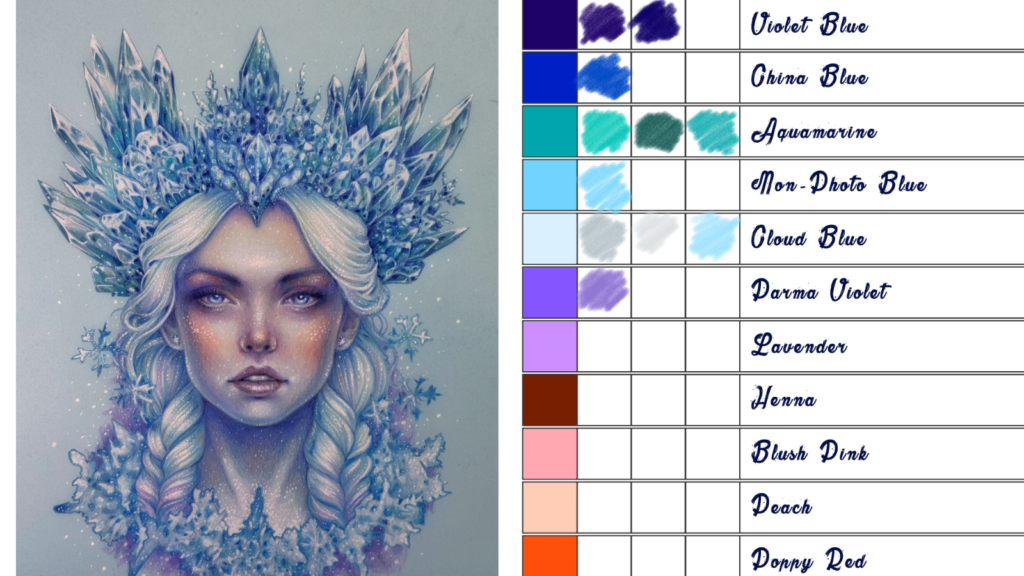
Crystals, icy skin, snowflakes, and glitter. One ice queen, start to finish.
 $99
$99
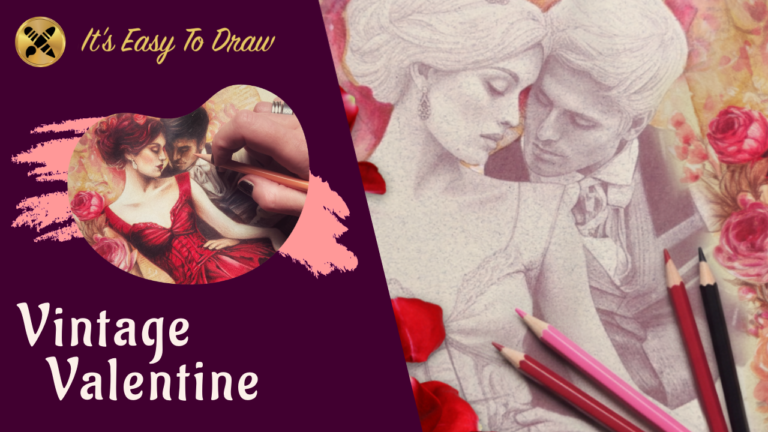
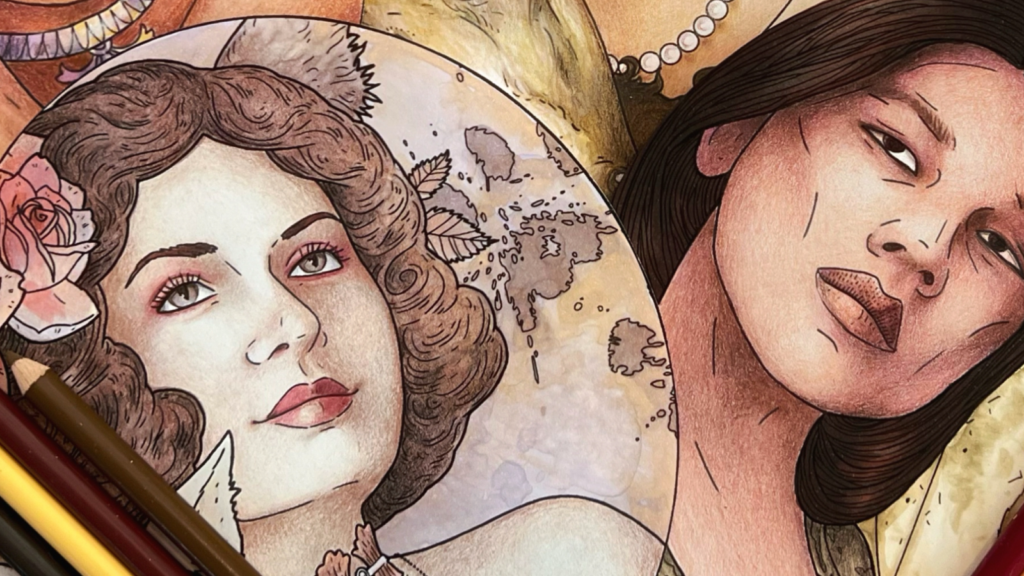
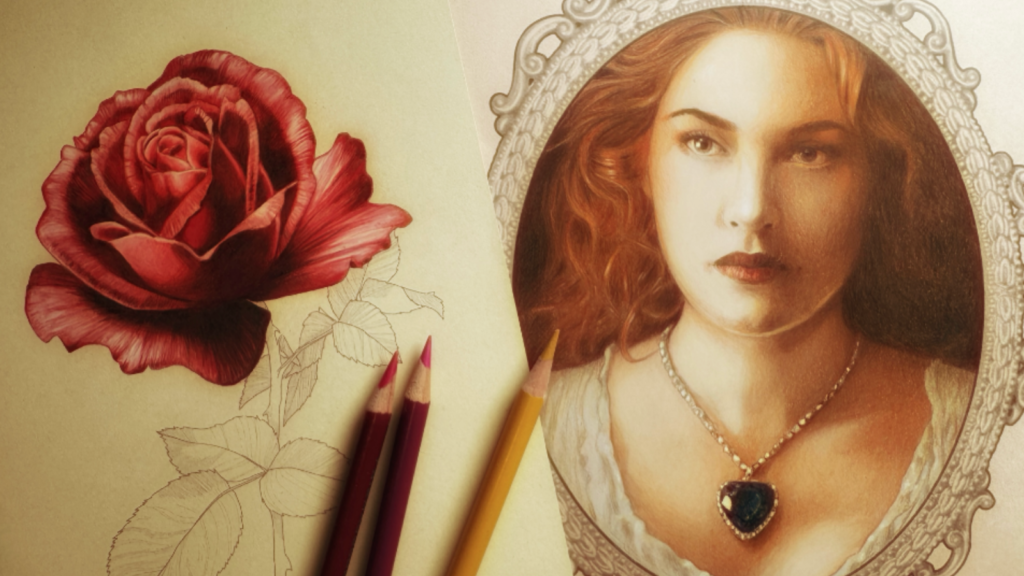
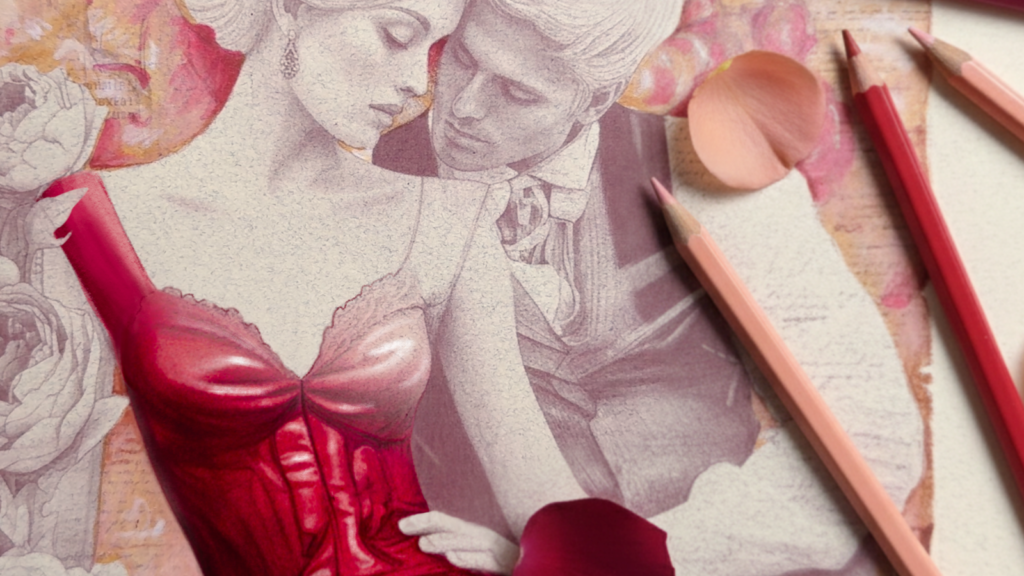
Pale skin, painterly hair, silk, roses, and vintage effects. One romantic portrait.
 $99
$99
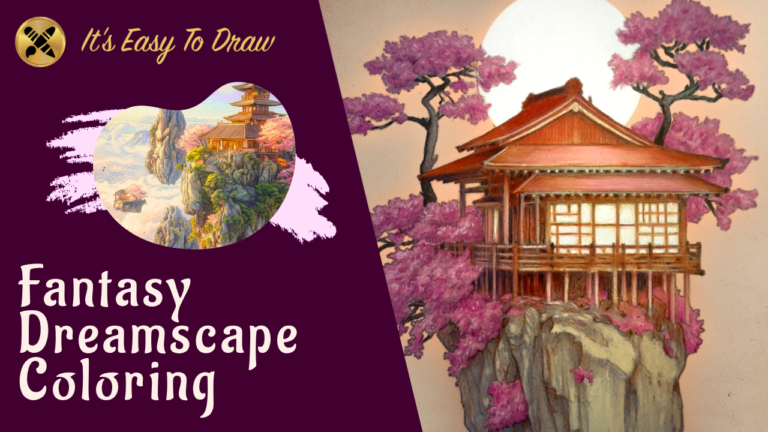
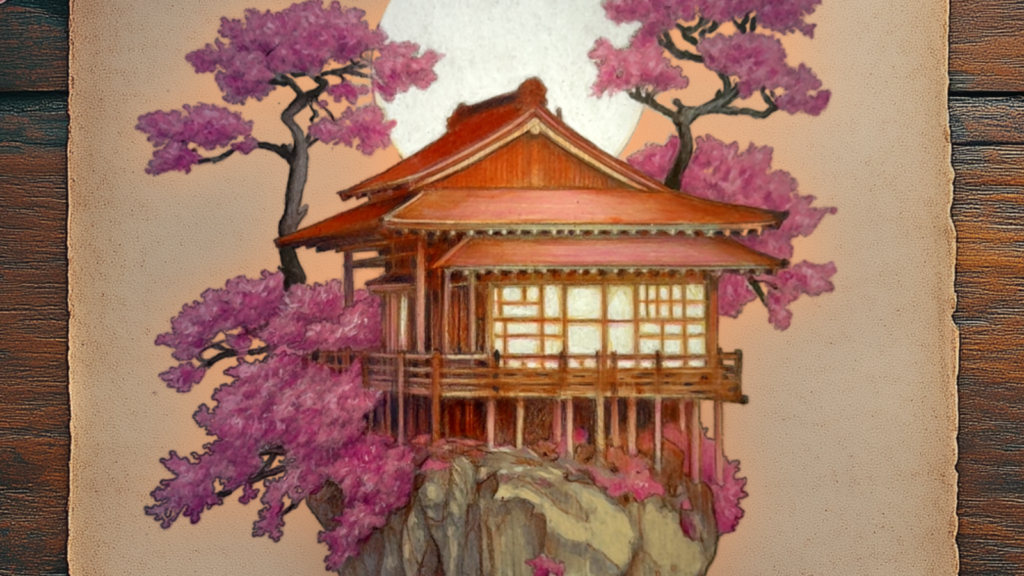
A cherry tree house dreamscape. Atmosphere, light, and fantasy.
 $99
$99
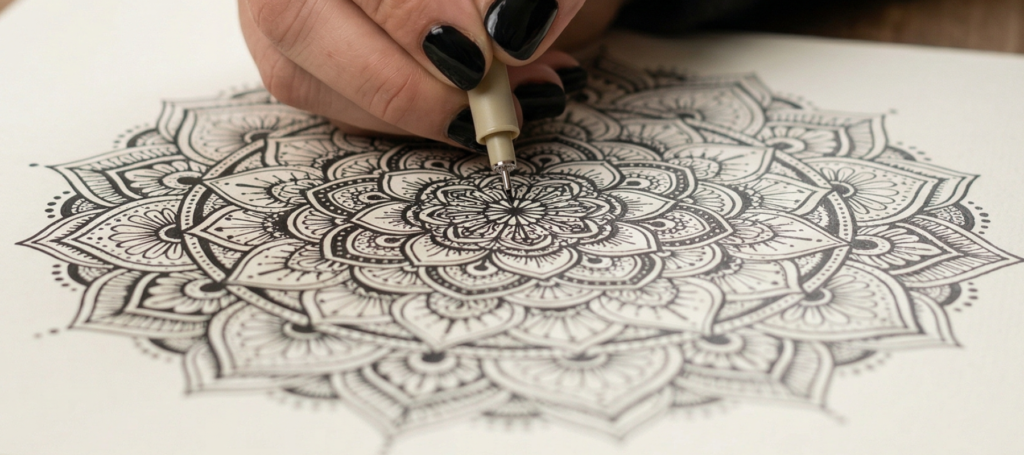
Mindful coloring that builds real technique.
 $99
$99
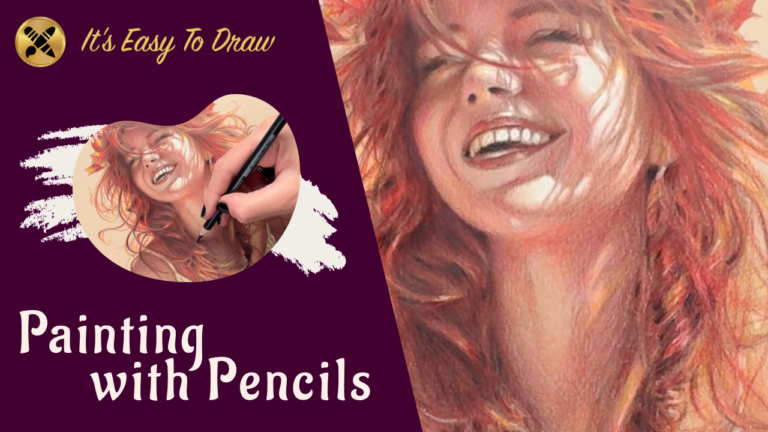
Make colored pencils look like paint.
 $99
$99
Light, transparency, and sharp facets. From single crystals to full clusters.
 $49
$49
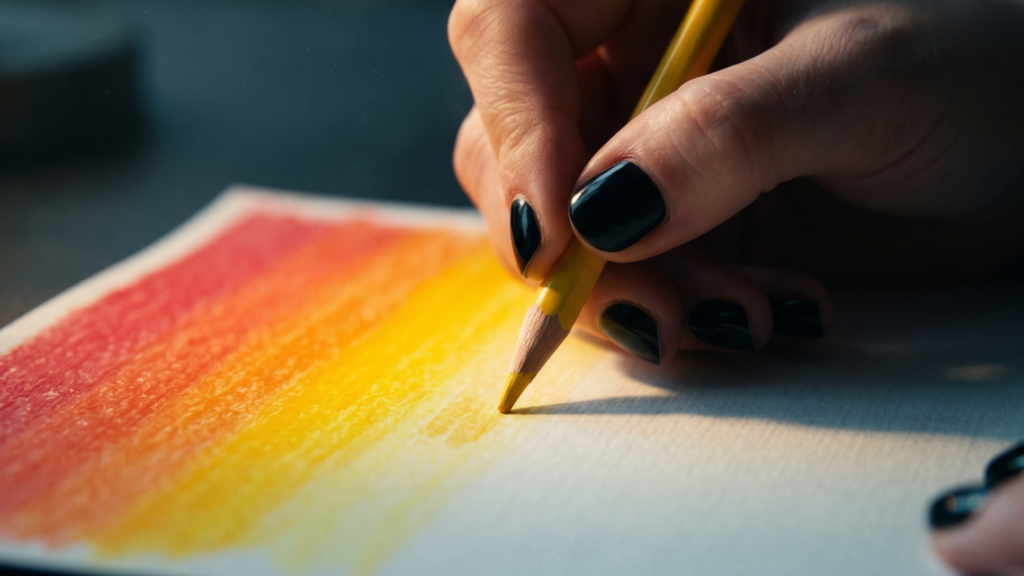
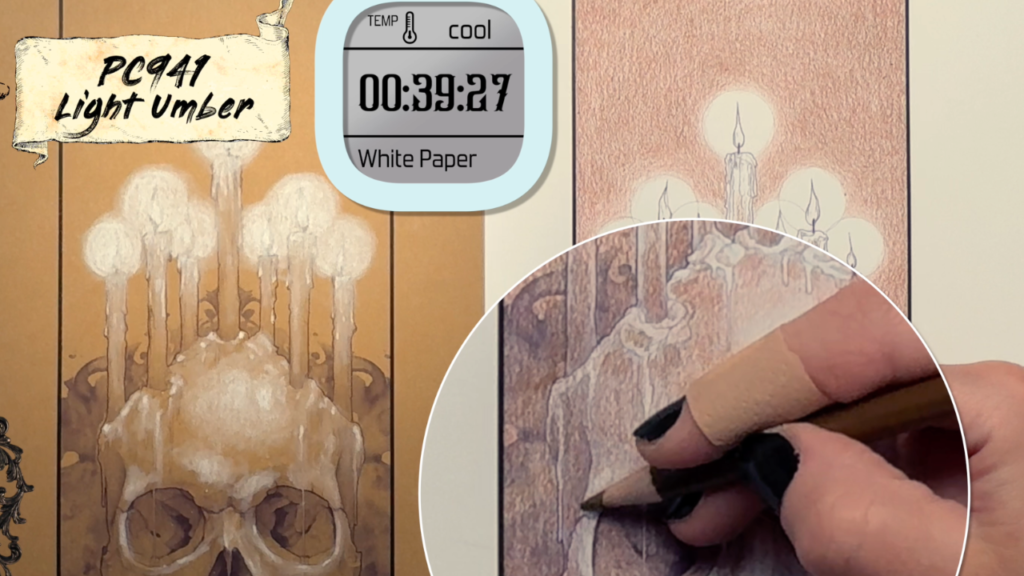
Same artwork, two papers, side by side. See exactly when tan beats white.

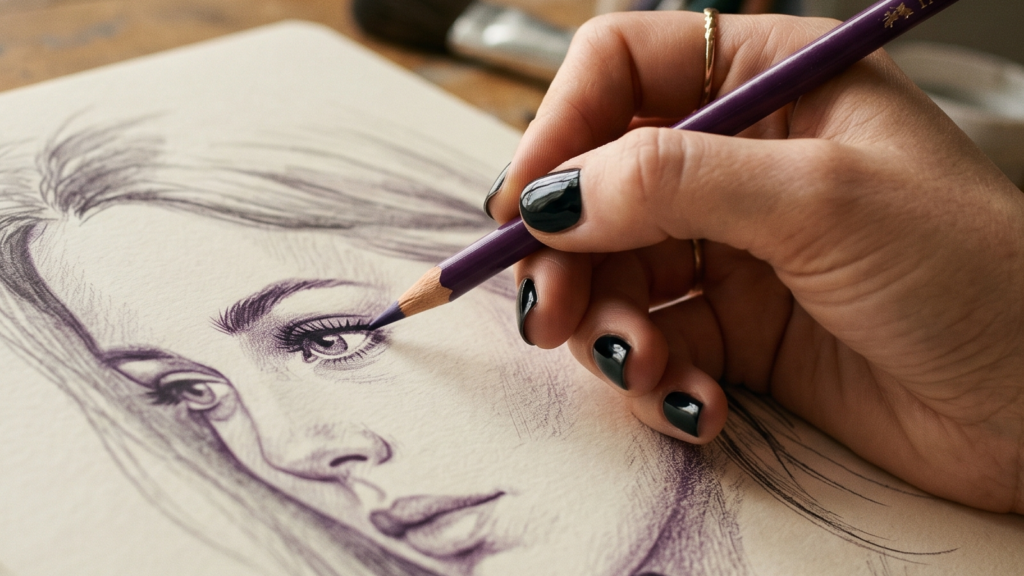
Before you can draw what you see, you need a hand that does what you tell it. This course builds the muscle memory, pencil control, and observation skills that make everything else possible. You will learn to calibrate your strokes, sketch with confidence, and capture a likeness from a reference photo.
By the end, you will have completed five full portrait drawings and built habits that carry into every course that follows.
After this course, you will...
- Control your pencil pressure and stroke direction with precision
- Sketch confident outlines without relying on graphite
- Shade like a colorist from the very first layer
- Capture facial proportions accurately from reference photos
- Build a daily practice routine that develops real skill
What's inside
- Your Three Pencils
- Circles Are Important
- Say No To Graphite
- Practice Visualization
- Building Good Habits
- Draw What You See
- First Complete Outline
- Shade Like A Colorist
- Why Shade A Sketch?
- Layer Lightly ▶ Preview
- Face And Head Outline
- Sketching Matching Eyes
- Pro Tips For Lips
- Bringing It All Together
- 5 portrait drawing exercises
This course is free. Become an Artisan for full access to every course in the Academy.
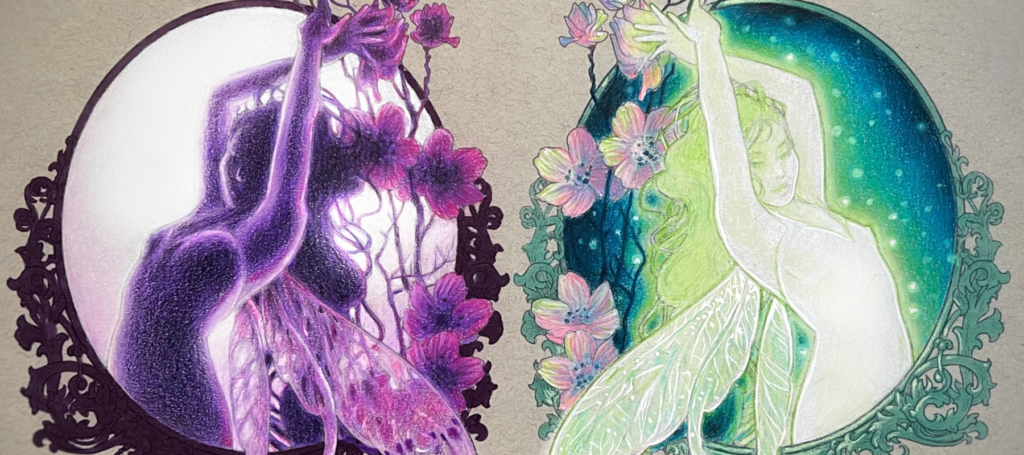
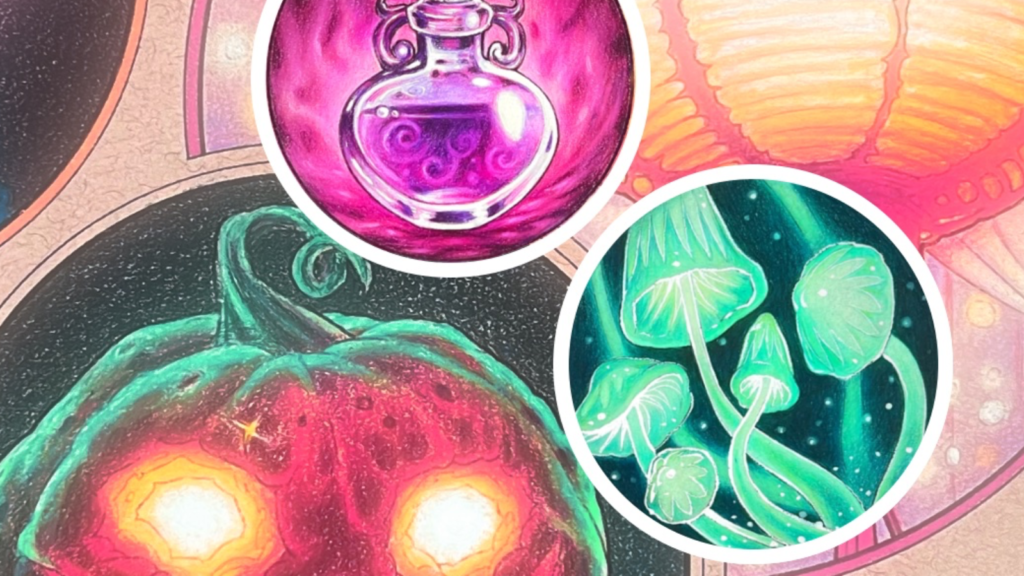
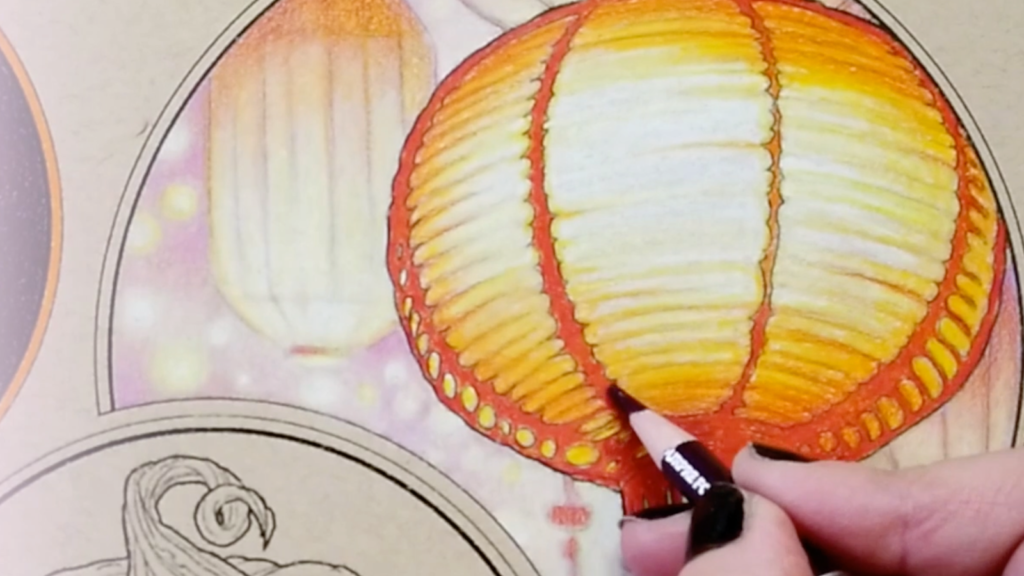
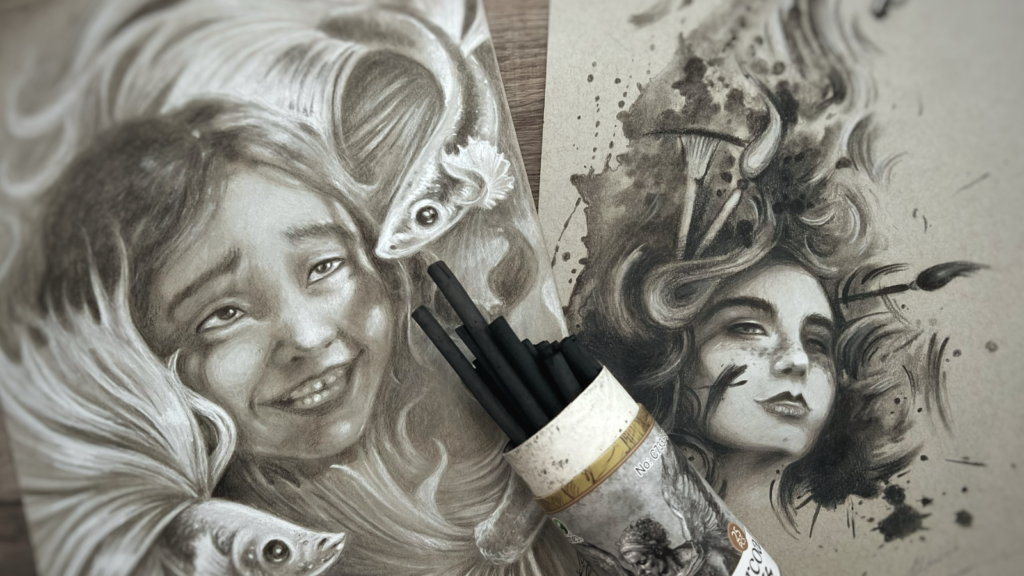
Glowing fireflies, luminous potions, flickering lanterns, radiant fairies. These fantasy glow effects look like magic on paper, and Lisa shows you exactly how to create them with colored pencils. You will master white primer techniques, dark background layering, and the color tricks that make light appear to radiate from within your drawings.
Four complete projects take you from bioluminescent creatures through glowing potions and candlelit lanterns to a fully rendered glowing fairy. Each builds on the last, adding new techniques for controlling light, contrast, and atmosphere.
After this course, you will...
- Create realistic bioluminescent glow effects with colored pencils
- Build rich dark backgrounds that make light pop
- Render glowing potions with smoke, text, and magical highlights
- Draw candlelight and lantern glow on warm and cool-toned paper
- Produce a complete glowing fairy illustration from sketch to finish

What's inside
- Magic Tricks
- Fireflies: Starting With White
- Fireflies: Layering Blues
- Fireflies: The Color Wheel Trick
- Fireflies: Adding Black And Yellow
- Fireflies: White Highlights
- Mushrooms: White Primer
- Mushrooms: Adding Green
- Mushrooms: Dark Background
- Mushrooms: Magic Green Glow
- Mushrooms: White Outlines
- Mushrooms: Extra Effects
- Jellyfish: What To Prime
- Jellyfish: Dark Background
- Jellyfish: Layering And Work
- Jellyfish: The White Pencil Effect
- Jellyfish: Adding Black
- Jellyfish: Magical Mystery Dots
- Bioluminescence Homework
- Green Potion: Free Hand Effects
- Green Potion: Dark Background
- Green Potion: Smoke
- Green Potion: White Primer
- Green Potion: The Green Experiment
- Green Potion: Adding Text
- Green Potion: Non-Glowing Items
- Green Potion: White Highlights
- Blue Potion: Starting Strong
- Blue Potion: A New Color Twist
- Blue Potion: White Charcoal
- Blue Potion: Adding Blues
- Blue Potion: Consider The Mood
- Blue Potion: Like Shadows
- Blue Potion: Magical Mystery Dots
- Magenta Potion: Evil Glow
- Magenta Potion: Purple Magic
- Magenta Potion: Lots of White
- Magenta Potion: An Odd Choice
- Magenta Potion: High Contrast
- Potions Homework
- Candles: Warm Toned Paper
- Candles: Background Colors
- Candles: Flame Stick
- Candles: No Flame Outlines
- Candles: Cool Tones
- Candles: Pink ▶ Preview
- Candles: The Glow Within
- Candles: Flame Centers
- Paper Lanterns: Soft Light
- Paper Lanterns: Pink Paper
- Paper Lanterns: Pastel Combo
- Paper Lanterns: Brighter Colors
- Paper Lanterns: The Main Lantern Primer
- Paper Lanterns: The Overpainted Effect
- Jack-O-Lantern: Starting Dark
- Jack-O-Lantern: A New Type Of Primer
- Jack-O-Lantern: Pumpkin Color
- Jack-O-Lantern: Glow From Within
- Jack-O-Lantern: Fire Light
- Jack-O-Lantern: Advanced Maneuvers
- Lanterns Homework
- Sketch Fairy: Paper And Primer
- Sketch Fairy: First Model
- Sketch Fairy: Blender
- Sketch Fairy: First Shadows
- Sketch Fairy: Black
- Sketch Fairy: Contrast And Overviews
- Glowing Fairy: White Primer
- Glowing Fairy: First Steps
- Glowing Fairy: Center Focus
- Glowing Fairy: Black, Pink, and Green
- Glowing Fairy: Going Darker
- Glowing Fairy: Pale Pencils
- Glowing Fairy: Finishing
- Fairies Homework
This course is included with an Artisan Membership
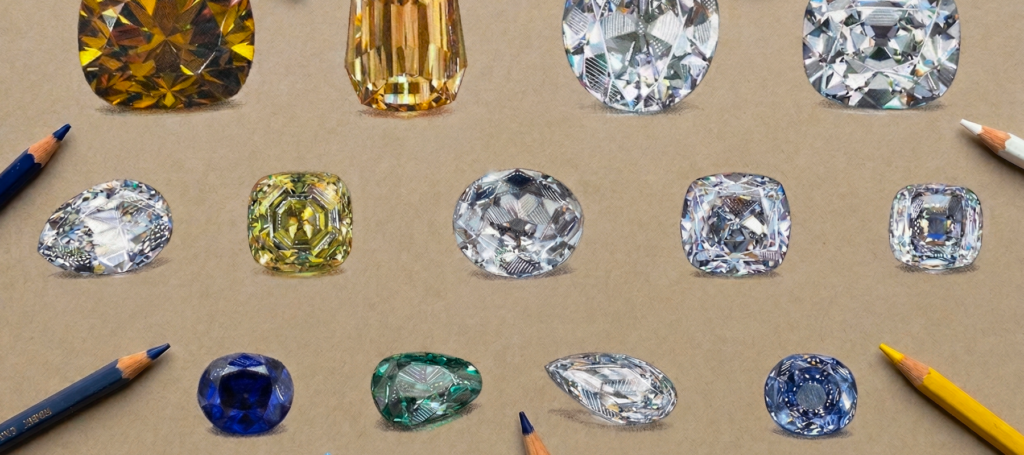
Opals, diamonds, sapphires, amber, pearls. Each gemstone has its own rules for light, color, and transparency, and Lisa breaks every one of them down. This is the most comprehensive colored pencil gemstone course available, covering everything from the soft iridescence of opals to the hard sparkle of faceted diamonds.
You will work through four full modules plus bonus content, building from organic stones like amber and pearls through cabochon cuts, faceted sparkle gems, and finally diamonds. Each module includes color charts, homework, and practice pages.
After this course, you will...
- Render realistic opals, amber, and pearls with proper iridescence and luster
- Draw cabochon-cut gemstones including ruby, emerald, garnet, and star sapphire
- Create sparkling faceted gems at small and large scale
- Master diamond rendering with white and colorful variations
- Control transparency, glimmer, saturation, and contrast for any stone type

What's inside
- Iridescence / Opals
- Colors / Opals
- Blenders / Opals
- Highlights / Opals
- Color Chart / Opals
- Translucency / Amber
- Colors / Amber
- Blenders / Amber
- Highlights / Amber
- Color Chart / Amber
- Luster / Pearls
- Akoya Silver Pearl
- South Sea Golden Pearl
- Tahitian Blue-Green Pearl
- Pearls In A Shell
- Color Chart / Pearls
- Homework: Opal, Amber, Pearls
- Cabochons Overview
- Ruby Cabochon
- Emerald Cabochon
- Garnet Cabochon
- Peridot Cabochon
- Precious And Semi-Precious Stones
- Color Charts / Cabochons
- Star Stones
- Star Sapphire Steps 1-5
- Homework: Cabochons
- Gem Cuts
- Pear Emerald / Small Scale
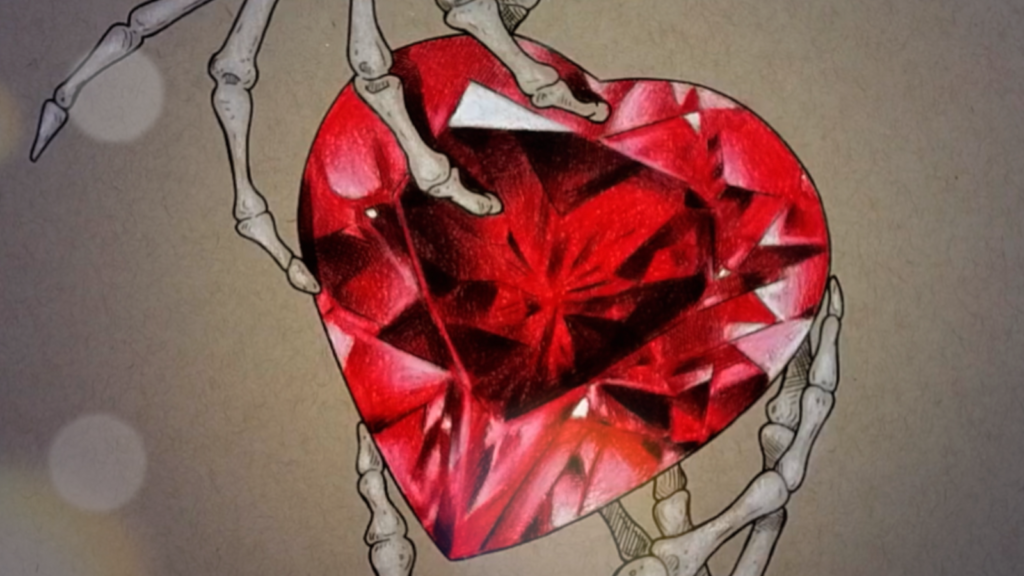
- Heart Ruby / Small Scale
- Radiant Sapphire / Small Scale
- Common Elements / Small Scale
- Large Scale Gemstone Coloring
- Amethyst / Large Scale
- Amethyst / Round Cut
- Amethyst / Glimmer
- Citrine / Color And Transparency
- Citrine / Glimmer
- Common Elements / Large Scale
- Fantasy Red Gem / Full Scale
- Fantasy Red Gem / Paper Color
- Fantasy Red Gem / Adding Black
- Fantasy Red Gem / Transparency and Glimmer
- Homework: Sparkly Gems
- Diamonds Overview
- Three Drawing Types
- Round White Diamond
- Heart White Diamond
- Pear White Diamond
- White Diamond Colors
- Colorful Diamonds / Orange
- Orange Diamond / Saturation ▶ Preview
- Orange Diamond / Contrast
- Blue Pink Diamond
- Blue Pink Diamond / Contrast
- Diamonds / All Together
- Homework: Diamonds
- Crystal Therapy Coloring (3 rose quartz lessons)
- Blue Opal Full Recording (7 lessons)
This course is included with an Artisan Membership
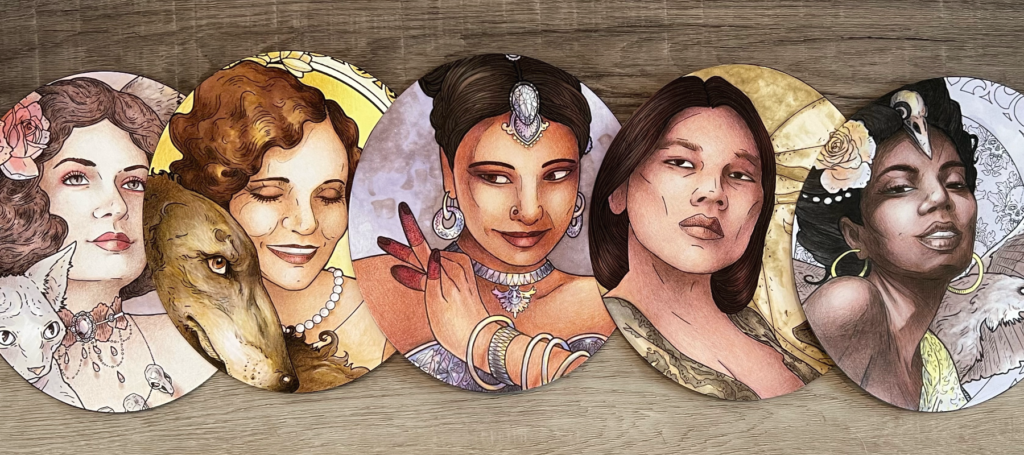
Five skin tones, five complete color systems. Lisa walks you through cream, peaches, caramel, toffee, and espresso from first pencil to final detail, teaching you how to identify undertones, layer pigments, and build realistic depth for every complexion. Each module includes its own color chart and homework.
You will learn which pencil brands and colors work best for each tone, how to handle shadows and makeup, and how to build your own reusable color palettes. The bonus ivory skin module adds a sixth tone for even more range.
After this course, you will...
- Identify and render five distinct skin tones with accurate undertones
- Build custom color palettes for any complexion
- Layer shadows, highlights, and makeup effects realistically
- Choose the right pencil brands and colors for each skin tone
- Create your own reusable color charts for future portrait work
What's inside
- Categorizing Skin Tones
- Picking Pencils For The Cream Skin Tone
- Coloring Technique And First Colors
- Brands Comparison
- First Dark Color
- Why So Many Colors
- Shadows And Makeup
- Final Colors
- Bringing It All Together
- Build Your Own Color Palette
- Cream Skin Tone Homework
- First Color
- Orange Undertone
- Building Up Brown Pigments
- Purple Shadows
- More Purple
- Color Charts
- What About Makeup? ▶ Preview
- Finalizing The Coloring
- Peaches Color Charts And Homework
- Pale Rose Undertone
- The Most Important Layer
- Ogres Have Layers
- Fine Details
- Strong Purple
- Yellow, White, And Black
- Final Details And Homework
- Color Matching And Gradients
- Color Matching Game
- Background Color
- Toffee Primer Color
- Light Brown
- Deep Purple
- A Natural Look
- Going Dark
- Blender Option
- Final Details And Homework
- Espresso Undertone
- A Bold Color Choice
- Strong Brown
- A Touch Of Red
- Building Up Shades
- Two Kinds Of Blenders
- Final Homework
- All Skin Tones Together
- Ivory Skin (9 lessons)
This course is included with an Artisan Membership
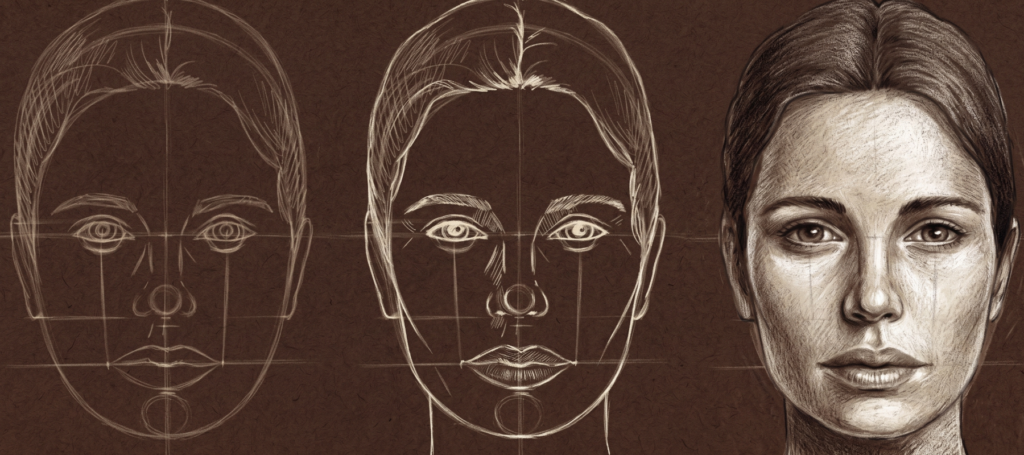
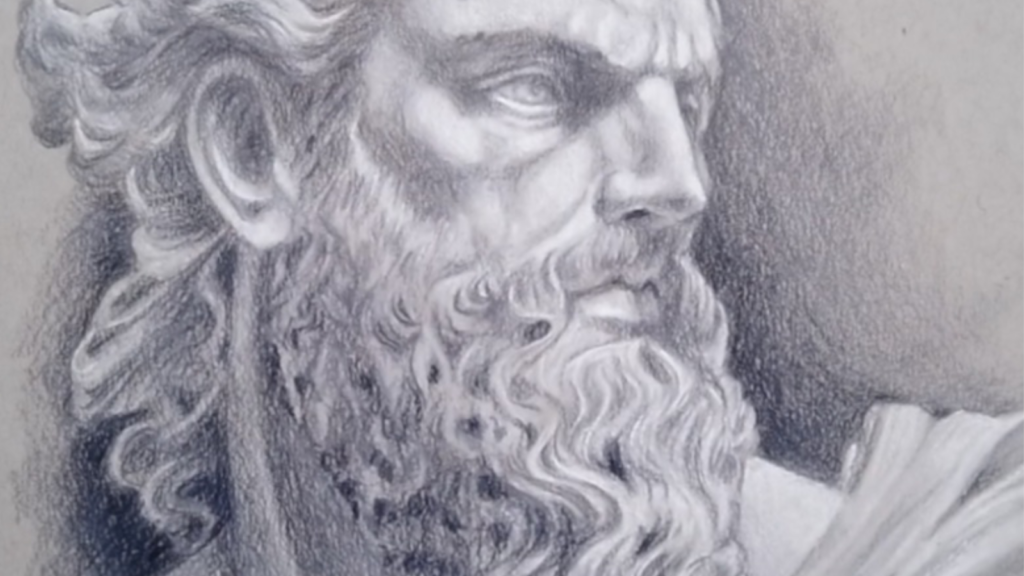
Faces are the most requested and most intimidating subject in drawing. This course removes the mystery by breaking portraits down into geometry, angles, and shading steps you can follow. Lisa starts with universal face geometry and frontal view templates, moves through profile and angled views, and finishes with realistic grey-scale shading from a reference image.
Each module includes guided sketching exercises and homework with printable templates. The bonus content adds a live lesson recording covering charcoal techniques and an 11-part older face study in charcoal.
After this course, you will...
- Understand universal face geometry and proportions
- Draw accurate frontal, profile, and angled face views
- Sketch freehand portraits with confidence
- Shade realistic grey-scale portraits from reference photos
- Use blender pencils and black for depth and dimension
What's inside
- Your Collection of Portrait Guides
- Why Portraits Are Challenging
- Pre-Course Drawing
- Separating The Features From The Character
- Understanding Basic Anatomy
- Universal Face Geometry
- The Frontal View Template
- Small Scale Doodles
- Homework 1
- The Profile Geometry
- Profile Sketching
- Common Face Angles ▶ Preview
- Guided Sketching
- Freehand Sketching
- Homework 2
- Working With A Reference Image
- Adding The Light Areas
- Soft Blending
- Adding Shadows
- Using Blender Pencils
- Adding Black
- Homework 3
- Freehand 3/4 View Face Geometry
- Ghost Shading
- Underpainting
- Contrast Shading
- Blending And Detail
- Homework 4
- Live Webinar Recording
- Older Face in Charcoal Full Recording
This course is included with an Artisan Membership
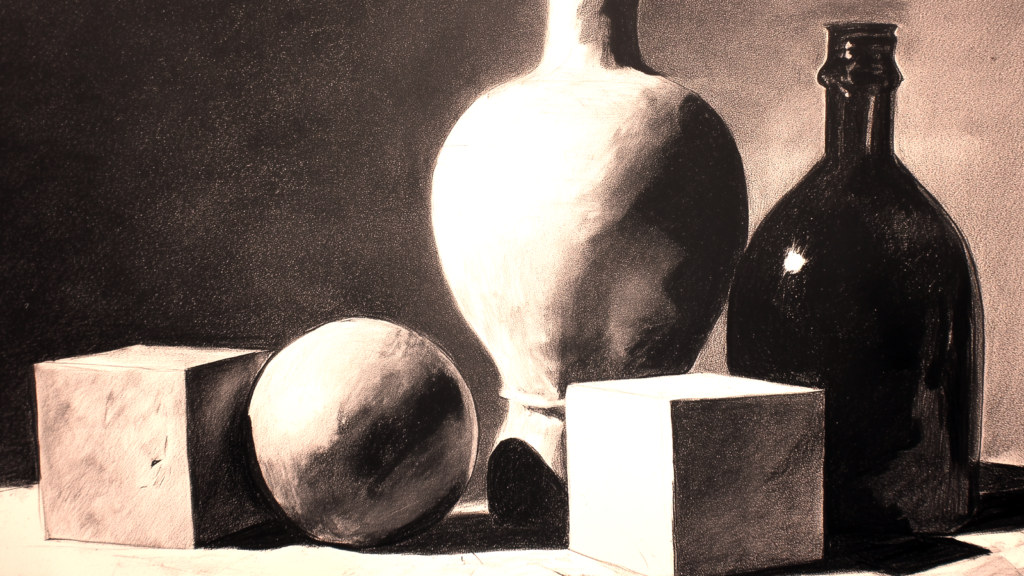
Everything starts here. This course builds the foundation that every other drawing skill depends on. Lisa covers tools, freehand technique, basic shapes, the grid method, freehand drawing from reference, and creating original art from collage. Each module builds on the last, and every lesson has a hands-on exercise.
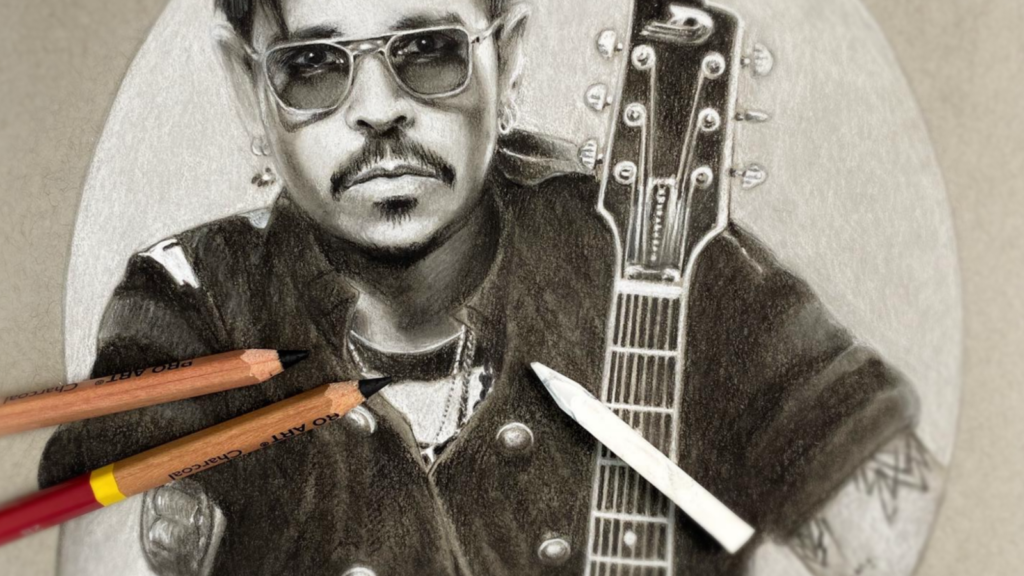
You will go from understanding your tools to producing original compositions with consistent lighting and shading. The bonus content includes a 13-part labyrinth ballroom drawing and a 9-part Jimi Hendrix charcoal portrait.
After this course, you will...
- Choose and use the right drawing tools, paper, and lighting setup
- Sketch freehand with loose, confident strokes
- Draw basic and 3D shapes with accurate symmetry and shading
- Transfer any reference photo to paper using the grid method
- Create original compositions from collage with consistent lighting
What's inside
- Understanding The Graphite Grading Scale
- The Many Types Of Charcoal
- Using A Colored Pencil To Sketch
- The Right Paper For Drawing
- Your Perfect Drawing Surface
- Personal Space And Time
- Pick Your Tools
- The Ideal Lighting For Drawing
- The Drawing Pyramid
- How To Loosen Your Hand
- Why Sketching Is So Important
- How Is Drawing Different From Sketching
- What Does Shading Accomplish
- How Much Detail Is Needed
- Practice Exercises
- Lines And Circles Practice
- Sketching And Symmetry
- Sketching 3D Shapes
- How Light Affects Shapes
- Get Your Hands Dirty
- How To "Sculpt" With Charcoal
- Practice Exercises
- Symmetry Exercises
- The Grid Method Mechanics
- Make A Grid On A Photo
- Copy The Grid To A New Page
- Block By Block Outline
- Hiding Or Removing The Grid Lines
- A Smooth Gradient Transition Technique
- Edge To Edge Shading
- Final Details And Cleanup
- Grid Drawing Assignment
- How To Use A Reference Image
- Freehand Sketching With Charcoal
- Control Your Style With Shading Decisions
- When It Is OK To Have Sharp Edges
- Tips To Control The Amount Of Detail ▶ Preview
- Photo vs Drawing Assessment
- Freehand Drawing Assignment
- Drawing From A Reference
- How To Use A Collage To Create Original Art
- Tell A Story With Your Art
- Do Visual Research
- Scale And Arrange Elements
- Proper Composition Elements
- How To Manage Consistent Lighting
- Collage Assignment
- Labyrinth Ballroom (13 lessons)
- Jimi Hendrix in Charcoal (9 lessons)
This course is included with an Artisan Membership
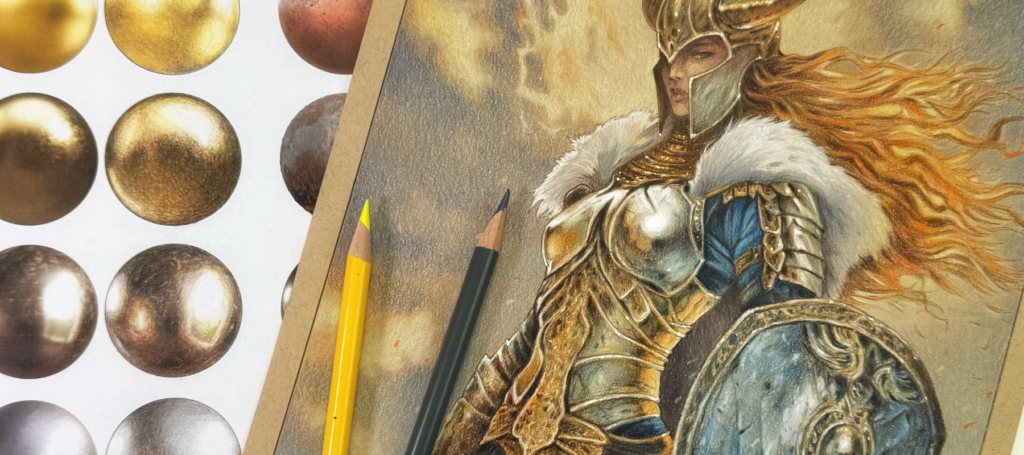
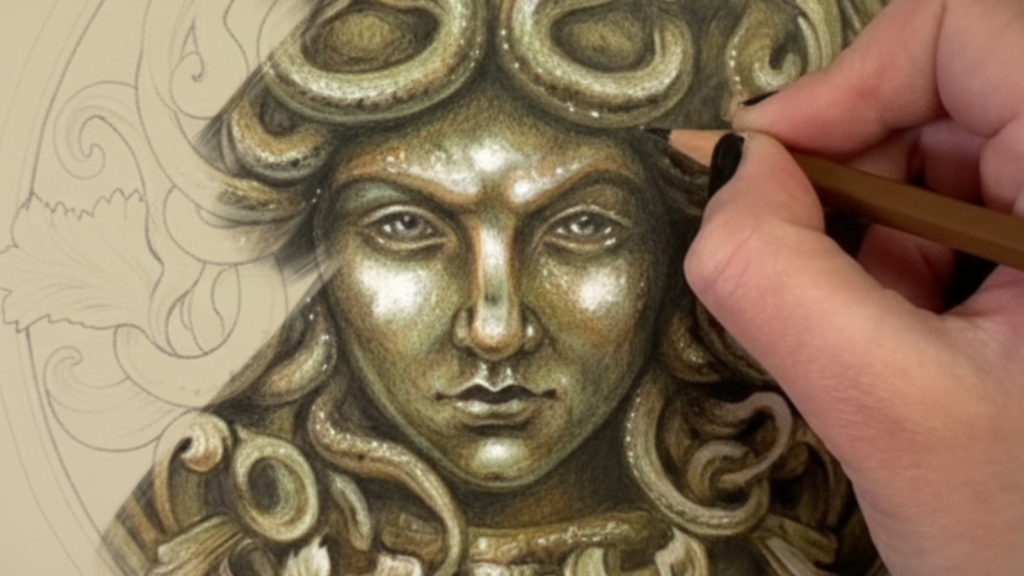
Gold, silver, copper, bronze, pewter, iron, rust. Each metal has a distinct color signature and texture, and Lisa teaches you how to replicate all of them with colored pencils. This course goes deep, covering not just the colors of metal but the textures that make them convincing: smooth, scratched, tarnished, riveted, and rusted.
You will progress from mastering individual metallic colors through texture studies to rendering complete metallic objects like a silver apple, gold ribbon, and bronze medallion. Every module includes homework and practice assignments.
After this course, you will...
- Reproduce the distinct color signatures of gold, silver, copper, bronze, pewter, and iron
- Render five different metal textures: smooth, scratched, tarnished, riveted, and rusted
- Shade 3D metallic objects with realistic highlights and contrast
- Combine warm and cool tones to create convincing metallic surfaces
- Complete a full bronze medallion rendering with patina effects

What's inside
- The Different Metal Colors
- Smooth Gold
- Shiny Yellow Alloy
- The Grey Area
- Satin Silver
- Textured Copper
- Rust Effects
- Dark Pewter
- Wrought Iron
- Metal Colors Homework
- Shiny And Smooth
- Heavily Scratched
- Textured And Tarnished
- Rivets And Rust
- Rust On Paint
- Metal Textures Homework
- Silver Apple
- Shape Shading
- Cool And Warm
- High Contrast ▶ Preview
- Final Details
- Silver Apple Homework
- Gold Ribbon
- Initial Shaping
- 3D Definition
- Lighter Than Paper
- Sharp Detail
- Silver And Gold Homework
- Paper Color And Primer
- First Green
- Consistent Shading
- Shading With Sepia
- Adding Reddish Brown
- Adding Aqua
This course is included with an Artisan Membership
This is the complete colored pencil foundation course. Lisa covers everything from calibrating your pencils and understanding color terms to advanced shading techniques, color combos, mood, light and shadow, and a guided final project. If you are picking up colored pencils for the first time or want to fill in the gaps in your self-taught technique, this is where to start.
Each module includes practice pages and exercises. The final project brings everything together with a complete turtle rendering from light source setup to finished piece. Bonus content includes a 12-part Heart of the Ocean portrait and an 11-part realistic red rose.
After this course, you will...
- Calibrate your pencils and understand color terminology
- Master multiple shading techniques including gradients and 3D effects
- Build effective color combos using color wheel relationships
- Control mood and atmosphere through color and lighting choices
- Render realistic light and shadow on any subject
- Complete a full colored pencil project from start to finish
What's inside
- Colored Pencils As A Medium
- Choosing The Right Pencils
- Important Color Terms ▶ Preview
- Colored Pencil Calibration
- Pencil Calibration Games
- The Grey Scale Calibration
- Grey Scale Calibration Continued
- Tint And Shade Calibration
- Cool And Matching Colors
- Practice Pages
- Shading Types
- Paper As A Tool
- Ways To Hold A Pencil
- Shading Styles
- Shading Scales
- Single Color Gradients
- Multi Color Gradients
- Contrast In Gradients
- Gradient Transitions With Black
- How To 3D Effects
- Practice Pages
- Color Wheel Combos
- Complementary Color Combo
- Analogous Color Combo
- Split-Complementary Color Combo
- Triadic Color Combo
- Rectangle Cross Combo
- Color Combo Variations
- Shades, Tints, And Tones In Combos
- Make Your Own Palette
- Practice Pages
- How Color And Light Affect Mood
- Warm And Cool Colors
- The Romantic Mood
- The Melancholy Mood
- The Nostalgic Mood
- The Joyful Mood
- Step By Step Preparation
- Practice Pages
- The Basics Of Light Sources
- How Light Position Affects Mood
- Light Samples On Spheres
- Overhead Lighting
- Under Side Lighting
- Shutter Versus Shadows
- Atmospheric Perspective
- The Rembrandt Shadow
- Practice Pages
- Pick Your Turtle
- Set The Light Source
- Establish Shadows
- Add The First Golden Color
- Add The Second Golden Color
- Search For Different Gradients
- Add A Cool Highlight
- Enhance Shading
- Add Final Details
- Final Project Review
- Heart Of The Ocean portrait (12 lessons)
- Realistic Red Rose (11 lessons)
This course is included with an Artisan Membership
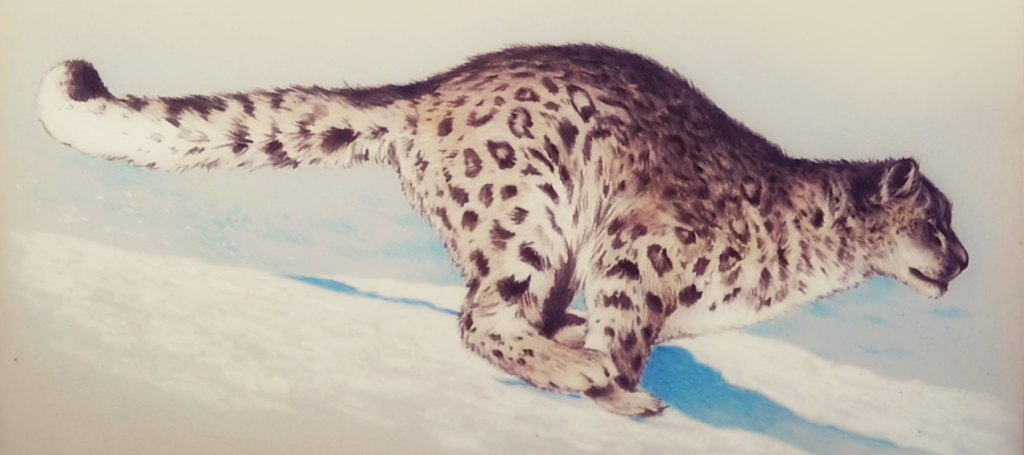
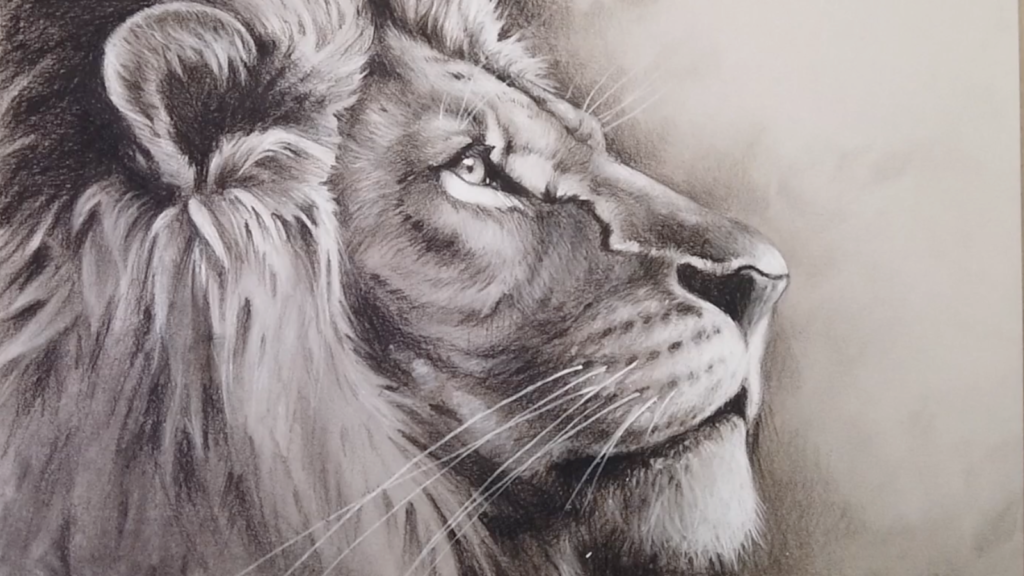
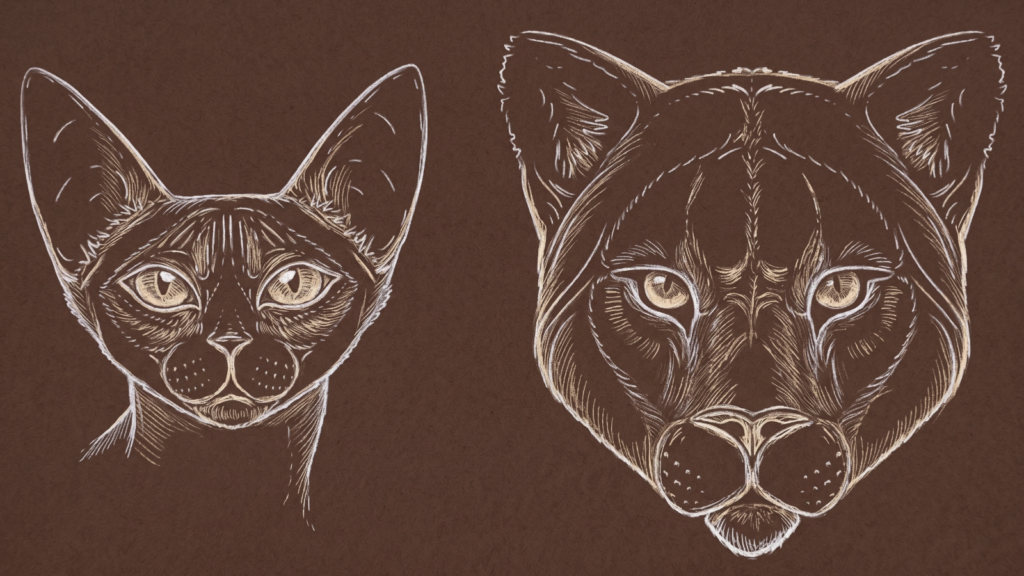
From house cats to lions, this course covers everything you need to draw realistic felines. Lisa starts with anatomy and movement, teaching you to sketch cats in graphite, charcoal, and colored pencils. You will learn facial geometry for both domestic and wild cats, then move into rendering different fur types before tackling big cats like ocelots, snow leopards, and lions.
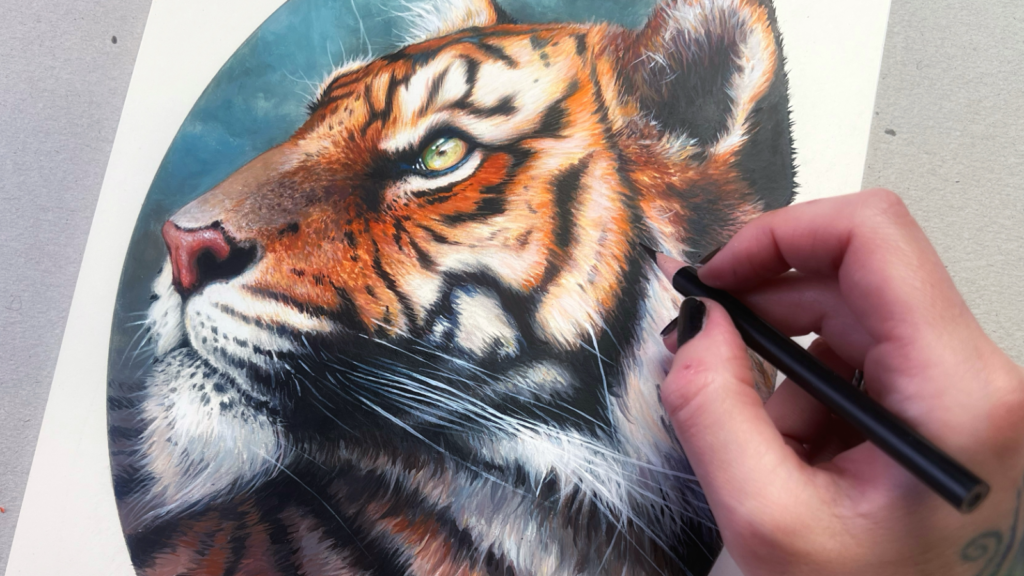
The final project brings it all together with a hyper-realistic tiger rendered in mixed media. Each module includes homework, guided practice, and drawing assignments.
After this course, you will...
- Sketch cat anatomy and movement in graphite, charcoal, and colored pencil
- Draw accurate facial geometry for domestic and wild cats
- Render multiple fur types including fluffy, tiger, leopard, and lion
- Draw big cats (ocelot, snow leopard, lion) with realistic detail
- Complete a hyper-realistic tiger portrait in mixed media
What's inside
- Sketching With Graphite
- Sketching With Charcoal
- Sketching With Colored Pencils
- Guided Sketching
- Feline Skeletal Structure
- Cats In Motion
- Different Head Tilts
- Homework: Chapter 1
- House Cat Quick Draw ▶ Preview
- House Cat Quick Draw (Continued)
- Wild Cat Quick Draw
- Wild Cat Quick Draw (Continued)
- Frontal Views Comparison
- House Cat Profile
- Wild Cat Profile
- Homework: Chapter 2
- Domestic vs Wild Cat Face Study
- Fluffy Kitten: Charcoal Sketch
- Fluffy Kitten: Textured Shading
- Fluffy Kitten: Fluff Illusions
- Tiger Fur
- Leopard And Jaguar Fur
- Lion Fur
- Snow Leopard Fur
- Fur Types Overview
- Homework: Chapter 3
- Ocelot: Lilac Base
- Ocelot: White Highlights
- Ocelot: Brown Fur
- Ocelot: Black Detail
- Snow Leopard: White Charcoal Base
- Snow Leopard: Blue Shadows
- Snow Leopard: Brown Spots
- Snow Leopard: Beige Fur
- Snow Leopard: Black Detail
- Lion: Working With Light And Shadow
- Lion: Controlling The Level Of Detail
- Lion: Knowing When It Is Done
- Tiger: Underpainting For Orange Fur
- Tiger: Background
- Tiger: Hyper Realistic Detail
- Tiger: Underpainting For White Fur
- Tiger: Mixing Media
- Tiger: Final Detail
- Lion Statue // Building Basic Shapes
- Lion Statue // Defining Detail
- Lion Statue // Shading With Value Scale
This course is included with an Artisan Membership

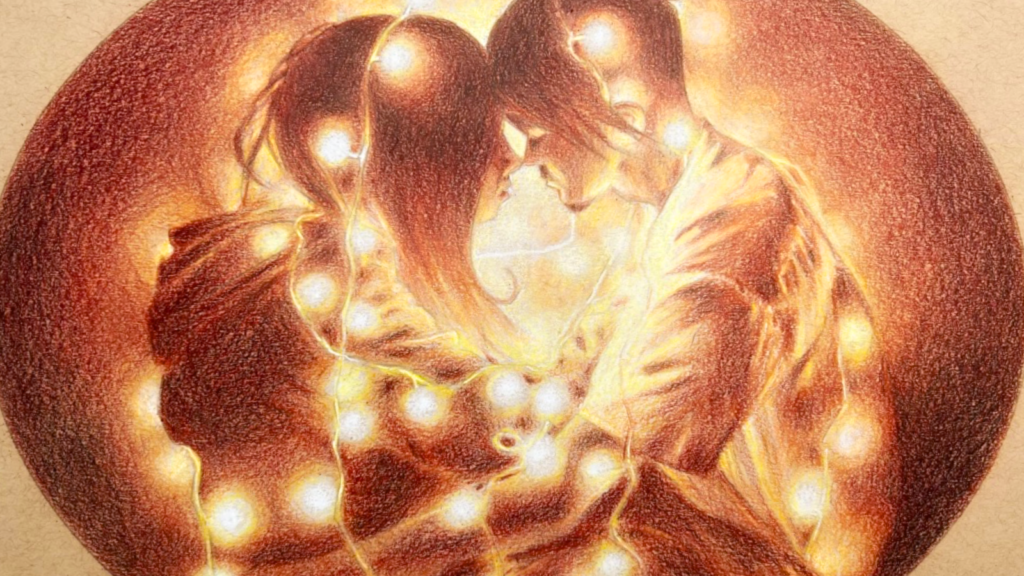
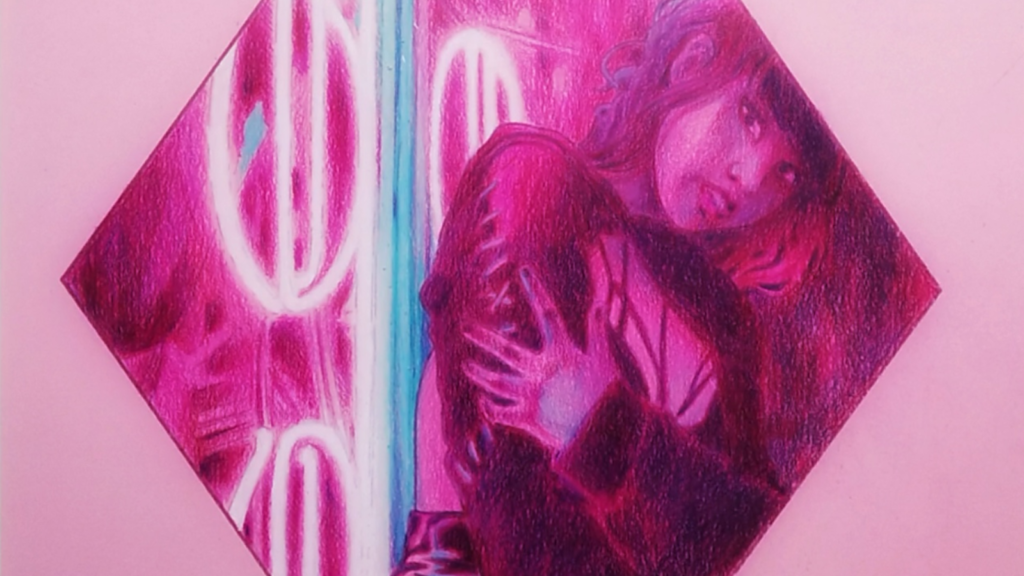
Three different light effects, three complete projects. Lisa teaches you how to create the illusion of glowing light on paper using colored pencils, starting with delicate twinkle lights, moving through soft bokeh backgrounds, and finishing with vibrant neon glow. Each project builds on specific layering and blending techniques that make light appear to radiate from within your drawing.
You will learn why toned paper matters, how to use white charcoal as a foundation layer, and the color sequencing that creates convincing glow effects at any intensity.
After this course, you will...
- Create realistic twinkle light effects with layered color and glow
- Render soft bokeh backgrounds with depth and atmosphere
- Produce vibrant neon glow effects with high contrast
- Use toned paper and white charcoal as foundation layers
- Control color sequencing to build convincing light at any intensity
What's inside
- The End Goal
- The Glow Effect Structure
- Why We Use Toned Paper
- The Q-Tip Trick
- The First Color
- Smooth Shading
- Complete The First Color Layer
- The Second Color
- Complete The Second Color Layer
- The Glow Light
- Adding Black ▶ Preview
- Twinkle Lights Homework
- What Is Bokeh
- Paper And Color Type
- White Charcoal Work
- The First Color Layer
- The Second Color Layer
- The Glow Color
- Adding Shadows
- Black Without Black
- The Main Subject Coloring
- A Touch Of Cool
- Adding Green
- The Cherry On Top
- Bokeh Homework
- What Makes The Neon Effect
- The Neon Bulbs
- The Most Important Layer
- Color Everything
- Smooth Blending
- Going Darker
- Building Up Contrast
- Adding Black
- The Second Neon Color
- Neon Glow Homework
This course is included with an Artisan Membership
Turn your original artwork into a printable coloring page, from first sketch to finished file ready for print or Etsy. Lisa walks you through every step: choosing a subject, composing the page, sketching characters and elements, inking clean outlines, and digitizing your work for professional-quality output.
This course includes homework assignments with student reviews at every stage, so you get real feedback on your progress. By the end, you will have a completed coloring page ready to sell or share.
After this course, you will...
- Design and compose an original coloring page from scratch
- Sketch characters and secondary elements with clean structure
- Ink professional outlines using light board and pens
- Digitize your artwork with proper scanning and editing
- Upload and sell your finished coloring pages on Etsy


What's inside
- The Tools You will Need For This Course
- What Is A Coloring Page
- A Drawing vs A Coloring Page
- Drawing Examples
- Coloring Page Subject Matter
- Coloring Page Composition
- The Pizza Fairy Study
- Inside Published Books By Other Artists
- Published Books Continued
- How To Compose A Coloring Page
- Page Composition Demo
- How To Make A Collage
- Coloring Page Homework 1 Explained
- A Look At Student Collages
- Ghost Sketching
- The Main Character Build
- The Secondary Elements Build
- Going Off Script
- Enhance Main Lines
- Main Lines Continued
- Main Lines Completed
- Tweak The Final Details
- Student Homework Review And Suggestions
- Coloring Page Homework 2 Explained
- Making Clean Outlines
- Student Projects
- Student Project Analysis
- Light Board Setup And Pens
- Line Tracing With Black
- Line Work Q&A
- A Neat Trick For Difficult Lines
- Using Line Variation ▶ Preview
- The Thick Outline Option
- Taking The Sketch Away
- Student Homework Review And Suggestions
- Colored Pencils Homework 3 Explained
- Digital Upload And Cleanup
- How To Scan Your Drawing
- How To Edit Your Scan
- How To Set The Margin
- The Eraser Tool And Other Adjustment Options
- How To Save Your File
- How To Print Your File
- Why Test Prints Are So Important
- How To Upload Your Art To Etsy
- Student Projects
- Student Submissions And Suggestions
- Final Homework
This course is included with an Artisan Membership
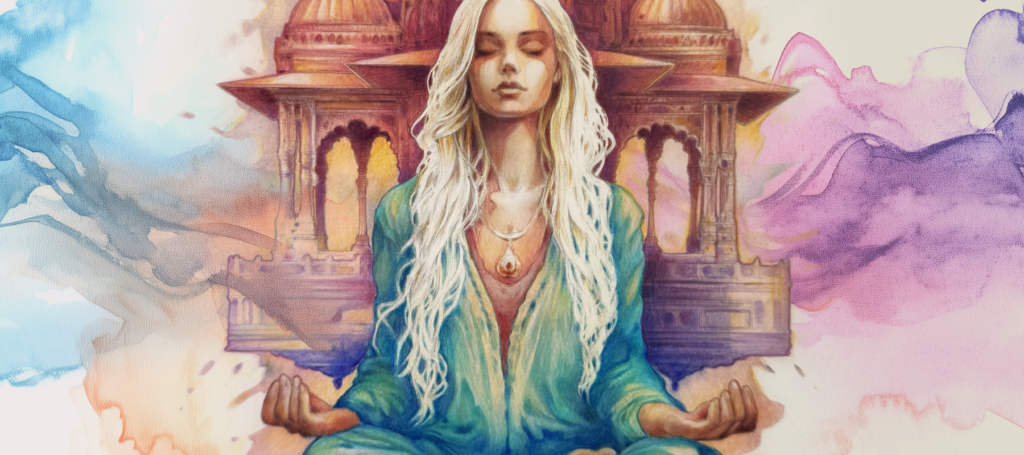
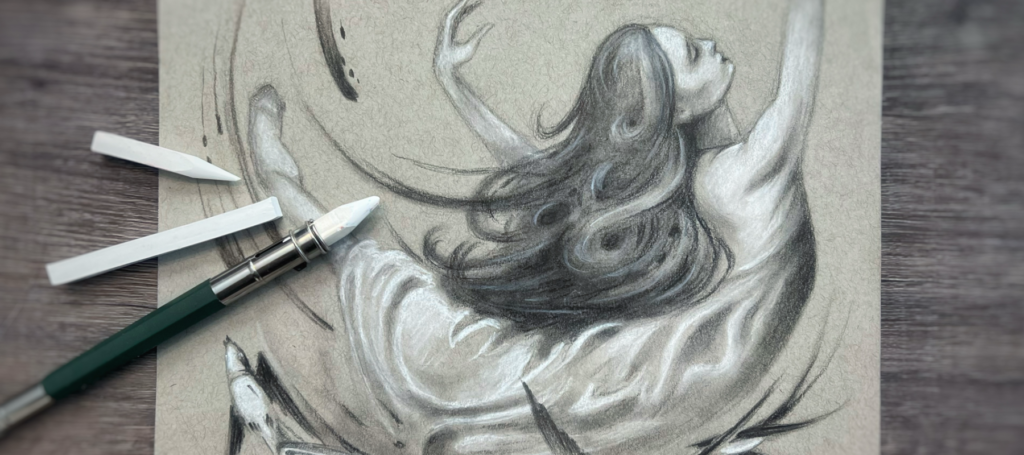
No water needed. Lisa teaches you how to achieve the soft, flowing look of watercolor painting using only colored pencils. Starting with a Zen temple scene, you will learn the shading strategies, gradient transitions, layering techniques, and pooling effects that create a convincing watercolor illusion. Then you will apply those techniques to flowing robes, skin tone, and lighting.
Three modules build from background technique through fabric and figure, finishing with a complete illustration that looks like it was painted with a brush.
After this course, you will...
- Create convincing watercolor effects with colored pencils alone
- Master gradient transitions, layering, and the pooling effect
- Render flowing fabric using negative space and restrained color
- Build watercolor-style skin tones with airbrushed blending and sharp shadows
- Complete a full illustration that looks painted with a brush

What's inside
- The Watercolor Look
- Getting the Hang of It
- Shading Strategies
- Gradient Transitions ▶ Preview
- Layering Techniques
- Blending With Color
- The Pooling Effect
- Best Color Choices
- Using Negative Space
- Painting vs Realism
- Learn to Hold Back
- Skin Tone Foundation
- Airbrushed Blending
- Sharp Shadows
- Consistency
- Glamor Glow
- Final Assignment
This course is included with an Artisan Membership
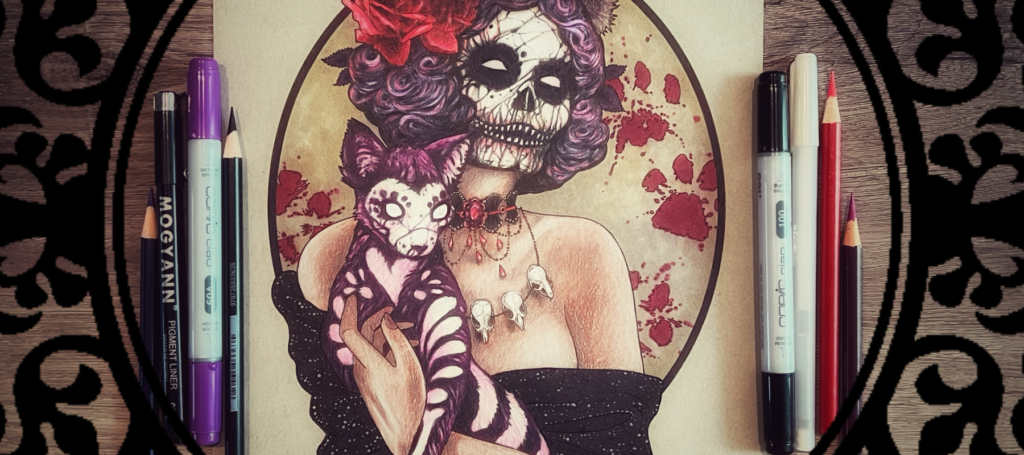
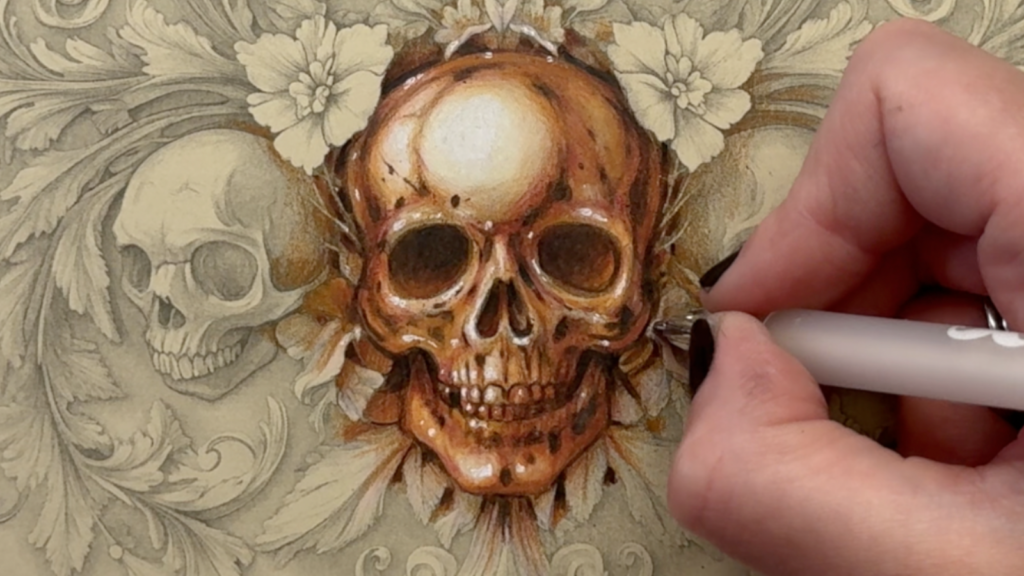
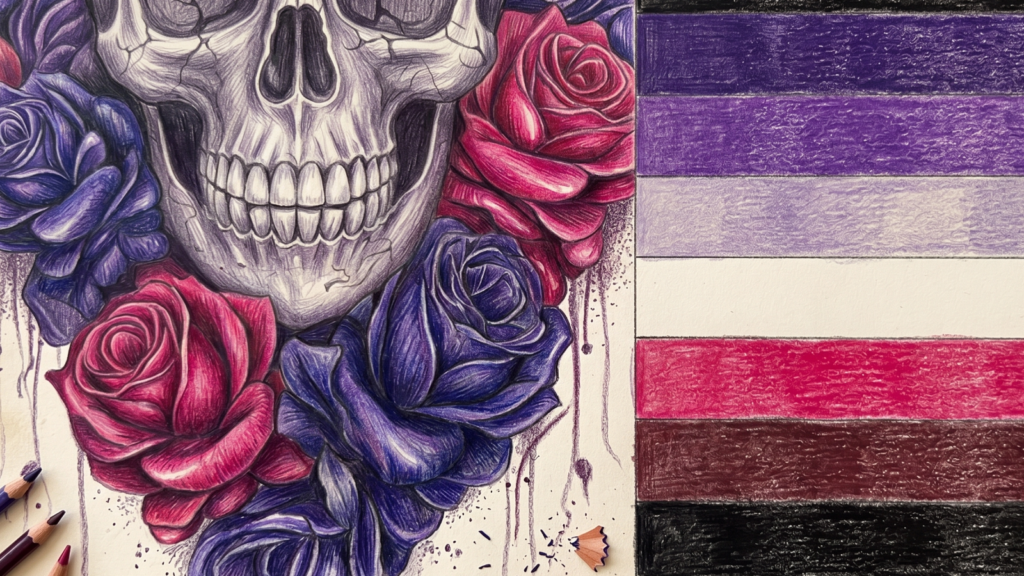
Skulls, undead skin tones, Day of the Dead cats, blood red roses, gothic jewelry, and glitter effects. This course is a single deep-dive project in gothic-themed coloring, covering mixed media layering, ink line work, and dark color palettes. Lisa walks you through every element of a complex Halloween illustration from start to finish.
You will learn how to achieve the skull look, work with appropriately undead skin tones, add glitter effects, and push contrast with black. The course finishes with an overview of alternative color palettes so you can apply these techniques to your own gothic designs.
After this course, you will...
- Color a complete gothic-themed illustration from start to finish
- Achieve realistic skull and undead skin tone effects
- Layer mixed media for rich, dark textures
- Add convincing glitter and jewelry effects with colored pencils
- Build gothic color palettes and push contrast with black

What's inside
- What Makes Something Gothic?
- Choose Your Weapons
- New Ink Lines For The Girl
- New Ink Lines For The Cat
- Adding White
- How To Achieve The Skull Look
- Mixed Media Layering
- Purple Hair
- Blood Red Roses
- An Appropriately Undead Skin Tone
- Day Of The Dead Cat ▶ Preview
- Gothic Jewelry
- Background And Color Matching
- You Can Not Have Too Much Black
- Adding Glitter Effects
- Overview And Other Color Palettes
- Homework
This course is included with an Artisan Membership
Recreate the luminous look of stained glass using colored pencils. Lisa takes you through every element: the translucent glass base, detailed textures, realistic fabric, skin tone, and red hair. Each module focuses on a different material within a single stained glass-inspired illustration, so you learn how to render multiple surfaces that all work together.
Five modules build to a completed project, teaching you color palette selection, white primer technique, shading, blending, and how to make flat colored pencil work look like light is passing through it.
After this course, you will...
- Build a stained glass color palette and apply white primer
- Shade and blend translucent glass base layers
- Add realistic glass textures and detail work
- Render fabric, skin tone, and hair within a stained glass composition
- Complete a full stained glass illustration from start to finish
What's inside
- Color Palette
- White Primer
- Shading Techniques
- Main Color
- Blending Color ▶ Preview
- Introducing Textures
- Textures and Detail
- Fabric Base
- Fabric Realism
- Fabric Accent Colors
- Skin Tone
- Red Hair
- Final Assignment
This course is included with an Artisan Membership
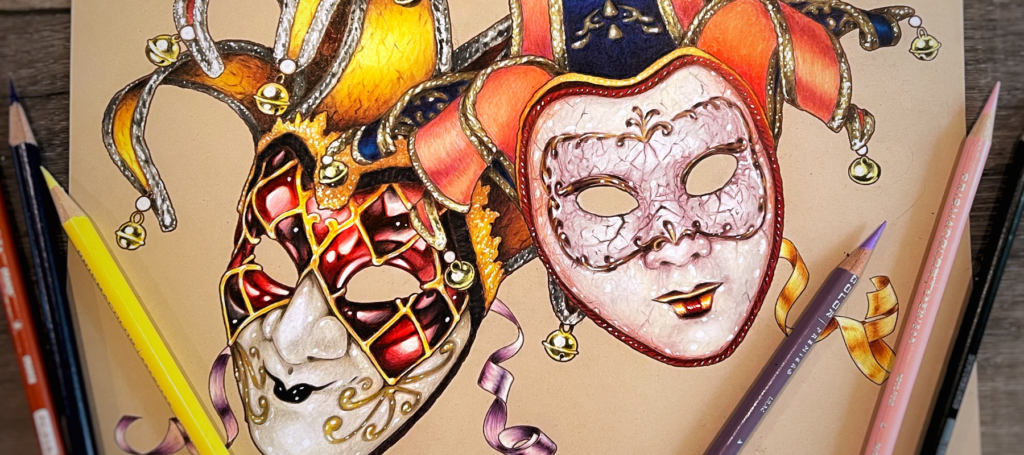
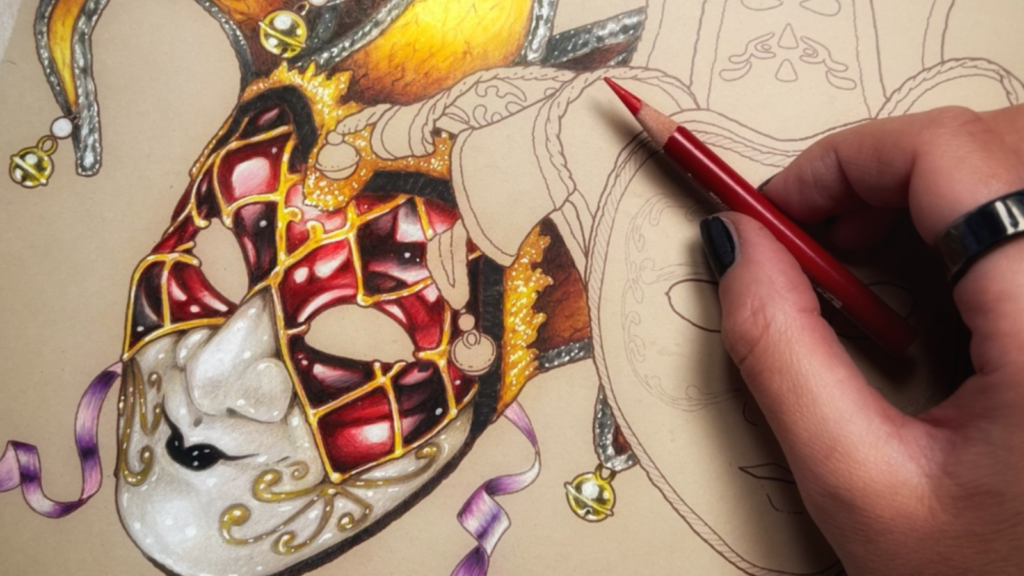
Two ornate Venetian masks, dozens of textures. This course is a deep study in rendering different materials side by side: golden fabric, brown velvet, silver trim, brass bells, red enamel, porcelain, gold leaf, cracked porcelain, pink satin, blue velvet, shimmery trim, and silk ribbons. Each texture gets its own focused lesson, and they all come together in two elaborate mask illustrations.
If you want to level up your ability to make colored pencil drawings look like they contain real materials, this is the course that will get you there.
After this course, you will...
- Render golden fabric, velvet, satin, and silk with distinct textures
- Create convincing metallic surfaces including silver trim, brass, and gold leaf
- Draw realistic porcelain and cracked porcelain with 3D gold leaf design
- Layer red enamel with harlequin patterns and inlay detail
- Combine multiple textures in a single complex illustration

What's inside
- Golden Fabric: First Step
- Golden Fabric: Cracked Texture
- Golden Fabric: Yellow Gold
- Golden Fabric: High Contrast
- Brown Velvet: Base Color
- Brown Velvet: Texture
- Silver Trim: Establish Shape
- Silver Trim: Two Types Of Grey
- Silver Trim: Adding Black
- Silver Trim: No Metallic Pencils
- Brass Bells: Consistent Effects
- Red Enamel: Prep Work
- Red Enamel: First Red
- Red Enamel: Second Red
- Red Enamel: Harlequin Pattern
- Gold Detail: Inlay And Lace
- Porcelain Face: 3D Shape
- Porcelain Face: Texture Definition
- Porcelain Face: Adding Decoration
- Porcelain Face: Matte And Gloss
- Purple Silk Ribbons
- Cracked Porcelain: White Primer
- Cracked Porcelain: Dusty Rose
- Cracked Porcelain: Detail Textures
- Cracked Porcelain: Freehand Cracks ▶ Preview
- Cracked Porcelain: Different Surfaces
- Cracked Porcelain: 3D Gold Leaf Design
- Cracked Porcelain: Shiny Surface
- Different Cord Effects
- Priming For Multiple Textures
- Pink Satin: Main Color
- Pink Satin: Smooth Texture
- Blue Velvet: One-Pencil Texture
- Blue Velvet: Shadows And Highlights
- Shimmery Trim: Base Color
- Shimmery Trim: Yellow And Black
- Shimmery Trim: Adding Sparkle
- More Brass Bells
- Last Minute Color Change
- Gold Ribbon Full Effect
This course is included with an Artisan Membership
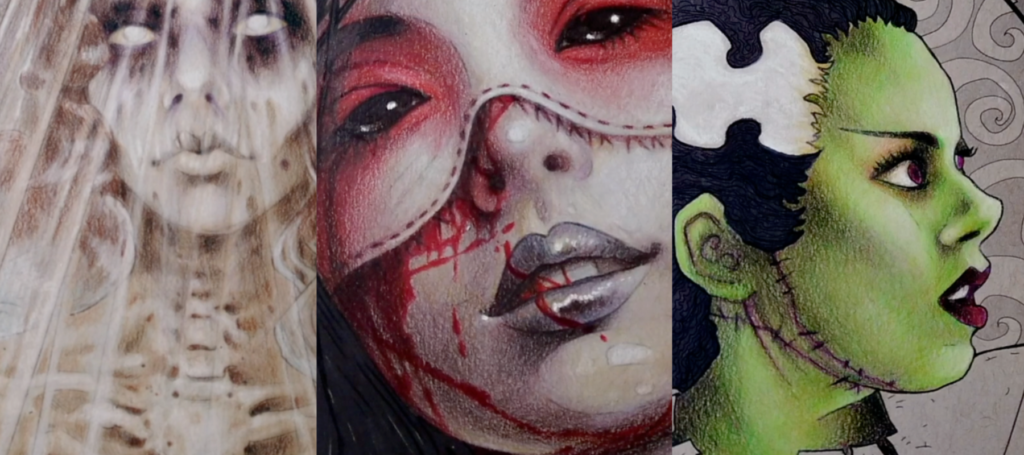
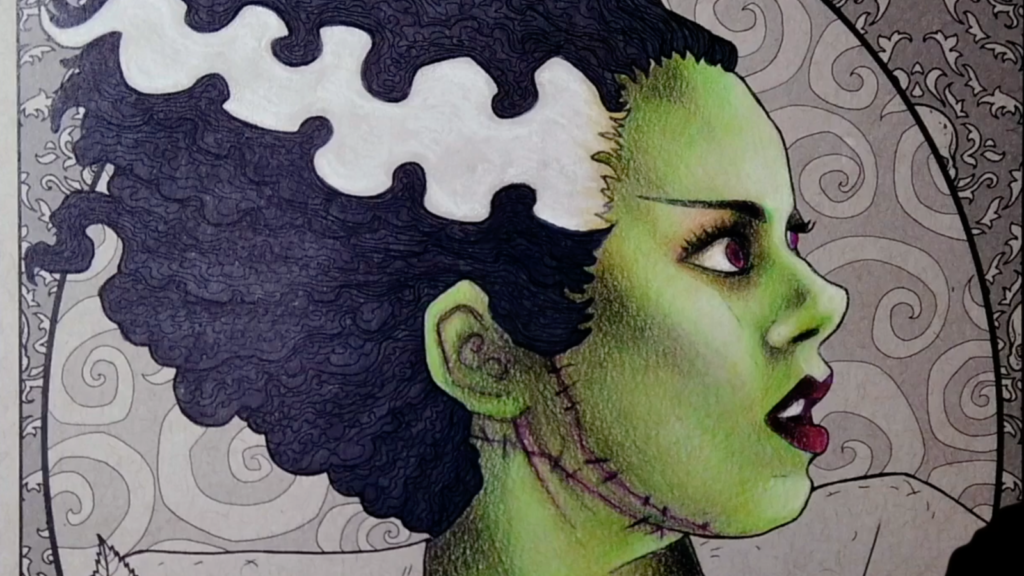
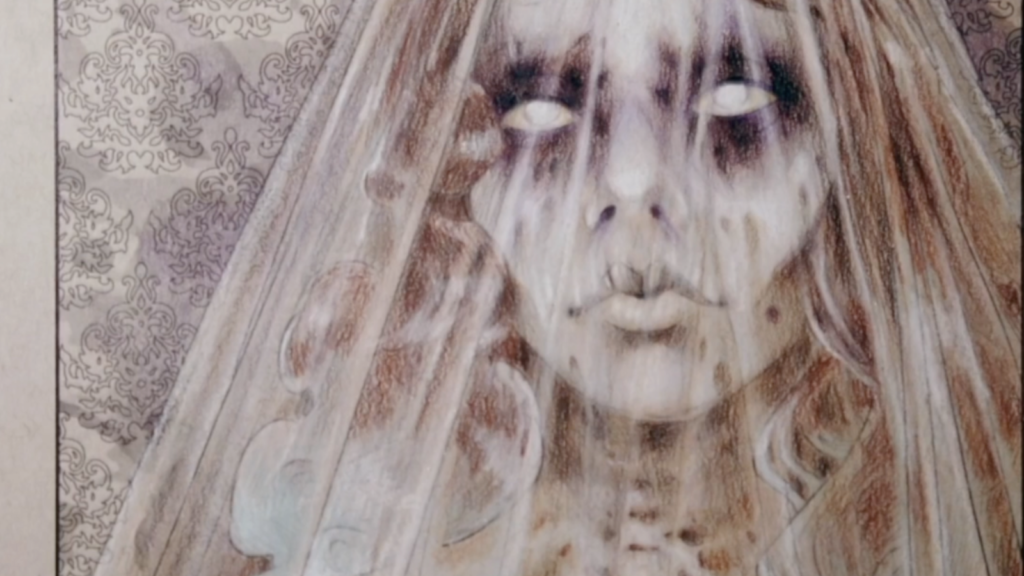
Three undead characters, three completely different skin techniques. Lisa teaches you how to color a ghostly white ghost bride, a dramatic purple-and-red Japanese demon girl, and a sickly green-skinned creature. Each project uses a unique approach to building unnatural skin tones that still look convincing and dimensional.
You will learn the bruise effect, deathly pale layering, blood splatter techniques, white charcoal vs white pencil priming, and how to use unexpected colors like purple and sunshine yellow to create skin that looks otherworldly.
After this course, you will...
- Create ghostly pale skin with the bruise effect and subtle color
- Build dramatic demon skin with purple shadows, red accents, and blood splatter
- Render sickly green skin using unexpected color primers
- Choose between white charcoal and white pencil for different undead effects
- Color three complete undead character illustrations

What's inside
- White Primer
- First Color
- The Bruise Effect
- The Creepy Look
- Less Color Is Better
- It Is All In The Eyes
- A Different Kind Of White
- Glamour Glow
- Shadow Work
- Purple Blend
- Darkness
- Sunshine
- Red Drama
- Deeper Into Detail
- Deathly Pale
- Devil Is In The Details
- Blood Splatter
- Touch-Ups
- White Charcoal vs White Pencil
- An Unexpected Color
- Pizza Face
- Bravery Comes In All Colors ▶ Preview
- Mind Tricks
- Primer Paying Off
- Purple To The Rescue
- Darker Shades
- You Did It!
This course is included with an Artisan Membership
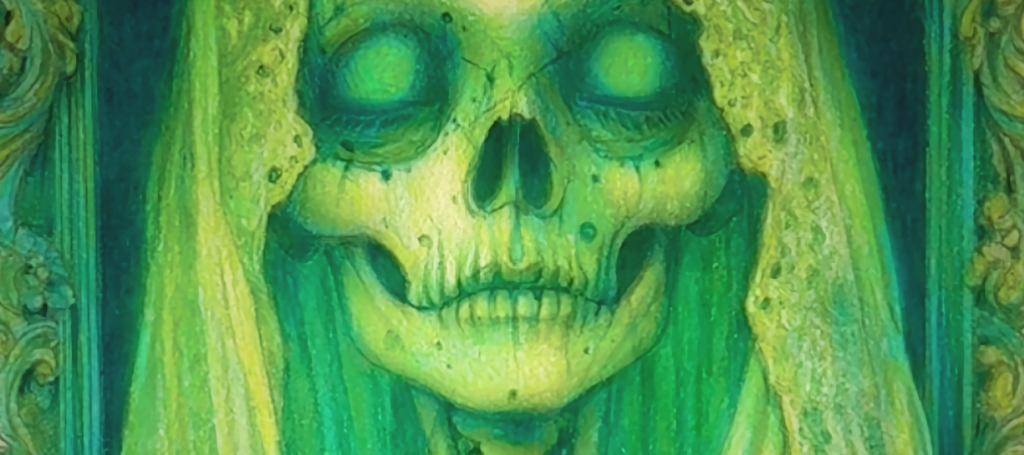
One ghost, one complete follow-along project. Lisa takes you step by step through creating a glowing ghost illustration, from white charcoal priming through detailed lace work, organic skin tones, and the final glamour glow. This is a focused, single-project course that teaches you how to build glow effects through contrast and layering.
Every lesson builds directly on the previous one, so you can color alongside Lisa in real time and finish with a complete piece.
After this course, you will...
- Prime with white charcoal and white pencil for glow foundations
- Build detailed lace and face priming techniques
- Blend and layer organic tones into a glowing subject
- Create glow through contrast and strategic color placement
- Complete a full glowing ghost illustration from start to finish
What's inside
- White Charcoal
- White Pencil
- Background Base Color
- Background To Primer
- Detailed Priming: Lace
- Detailed Priming: Face
- Introducing Blending
- Follow Through
- Organic Tones
- The Glow Color ▶ Preview
- Glow By Contrast
- Contrast And Detail
- Darkness And Glamour Glow
This course is included with an Artisan Membership
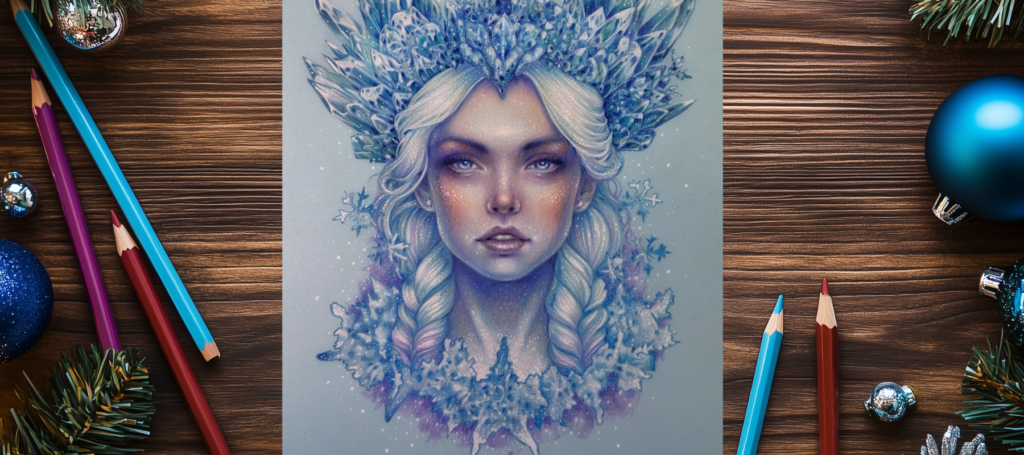
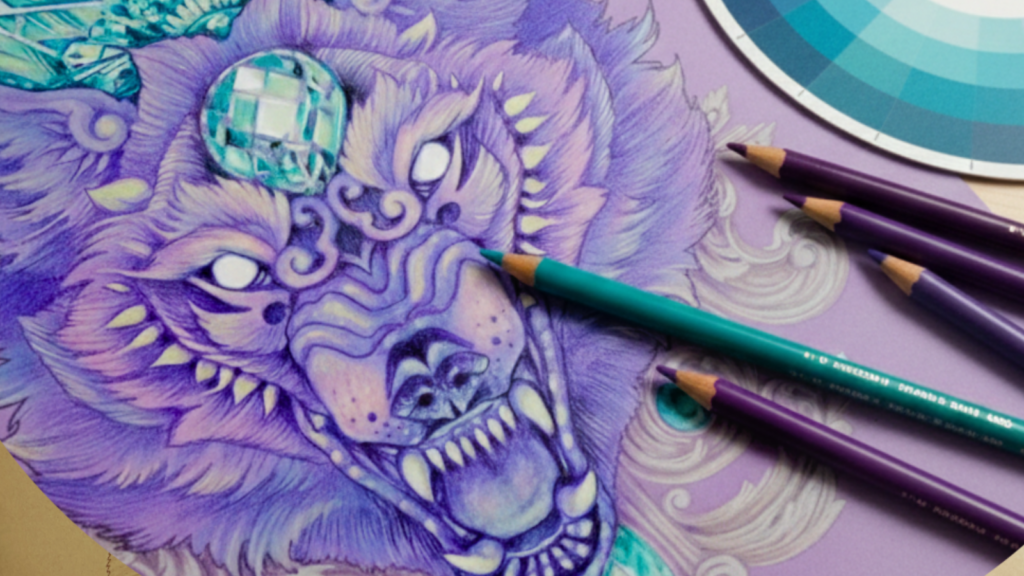
An ice queen illustration from start to finish. This course teaches you to render crystals, icy skin tones, glossy snowflakes, glitter effects, and sparkling details using a cool winter color palette. Lisa walks you through each stage: building a crystal crown, creating convincing cold skin with the sfumato effect, adding sparkle and shine, and finishing with glitter on skin, hair, and crystals.
Four focused modules take you from paper and palette selection to a completed illustration with real depth and shimmer.
After this course, you will...
- Build a wintery color palette and choose the right paper
- Render glossy crystal crowns with white primer and cool gradients
- Create icy skin tones using the sfumato effect and cool/warm balance
- Add glossy snowflakes, sparkling hair, and accent details
- Apply glitter and shine effects to skin, hair, and crystals

What's inside
- Tools You Will Need
- Paper Color
- Wintery Color Palette
- White Primer
- Base Gradient
- Aquamarine For Character
- Cool Blender Hue
- The Glossy Look
- Rinse And Repeat
- Primer Application
- Cool And Warm
- The Ice In Her Eyes
- The Sfumato Effect
- Shadow Work And Blending
- Icy Cold Lips ▶ Preview
- Hair Strands Primer
- New Blue
- Glossy Snowflakes
- A Breath Of Life
- Sharper Contrast
- She Has A Heart
- Accent Colors
- Glitter On Her Skin
- Sparkling Snowflakes
- Even The Hair Glitters
- Final Shine On Crystals
This course is included with an Artisan Membership
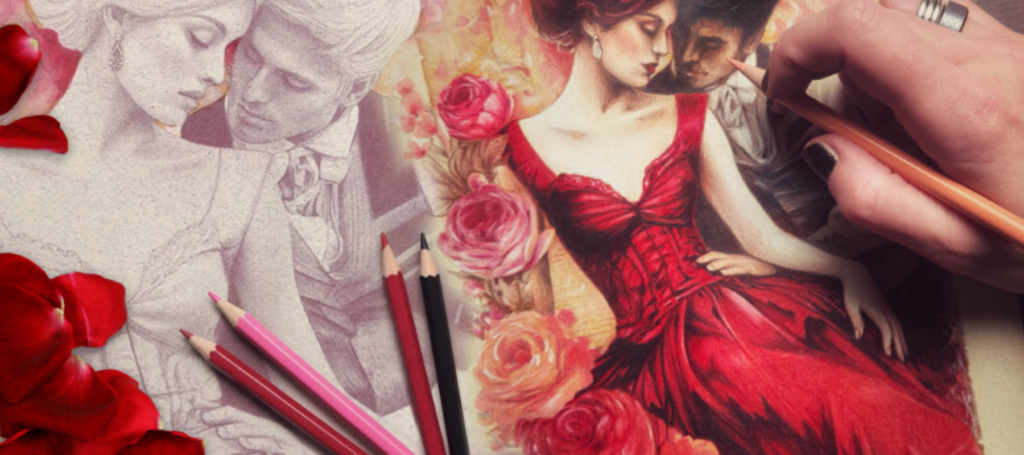
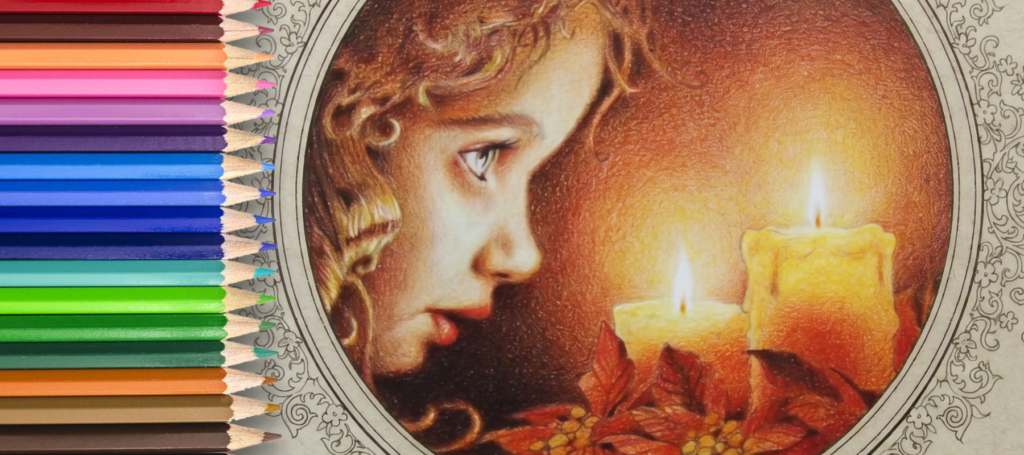
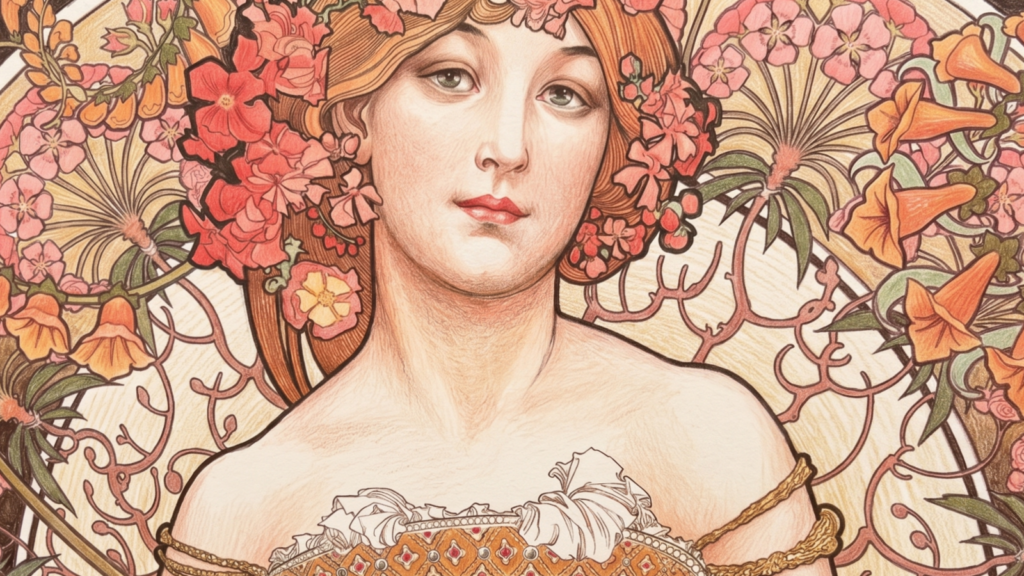
A romantic, vintage-styled portrait from start to finish. This course covers pale skin tones, painterly hair, quick portrait drawing, vintage photo effects, watercolor-style roses, shiny silk fabric, and bringing it all together into a cohesive piece. Lisa teaches mixed media techniques that give colored pencil work the look of an old photograph brought to life.
Eight modules take you through every element of the illustration, from setting the mood with paper and style choices to the final vintage artifacts and subject separation that make the finished piece feel like a timeless work of art.
After this course, you will...
- Set the mood with paper choice, style, and mixed media setup
- Render pale skin with realistic 3D effects and exaggerated contrast
- Draw quick portrait sketches with light, shadow, and dark hair
- Create vintage photo effects and essential black tones
- Paint watercolor-style roses and shiny silk fabric with colored pencils
- Bring all elements together with consistent style and subject separation
What's inside
- Paper And Style
- Mixed Media Advantage
- Pale Skin Primer
- Gentle Blending Technique
- First 3D Effect
- First Signs Of Realism
- Exaggerated Contrast
- Quick Hair Color
- Hair Detail
- Quick Portrait Draw
- Drawing With Light And Shadow ▶ Preview
- Dark Hair Technique
- Old Photo Look
- Essential Black
- The Watercolor Look
- Delicate Rose Petals
- Green That Looks Like Pink
- How Much Detail Is Needed?
- Silk And Roses Primer
- Achieving True Vibrancy
- Shiny Silk Look
- Sticking With It
- Staying Consistent
- Vintage Artifacts
- Pale Hands
- Subject Separation
- Final Thoughts
This course is included with an Artisan Membership
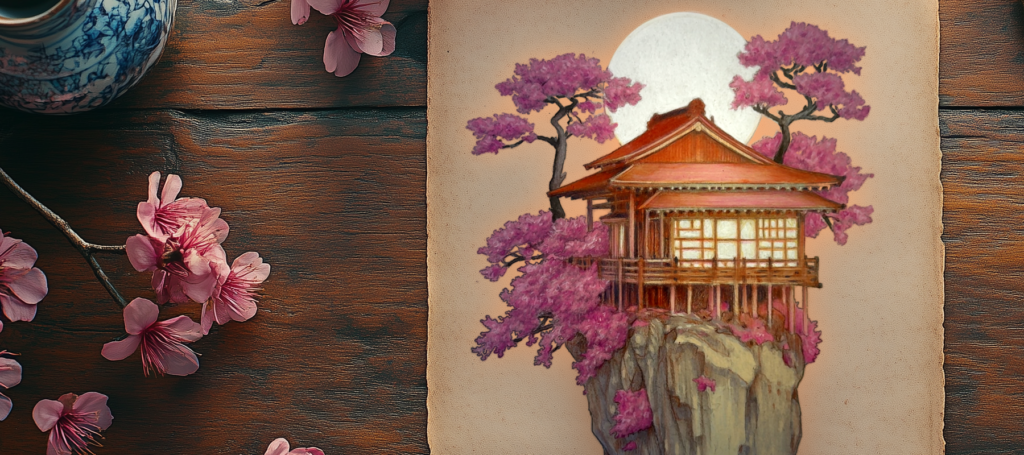
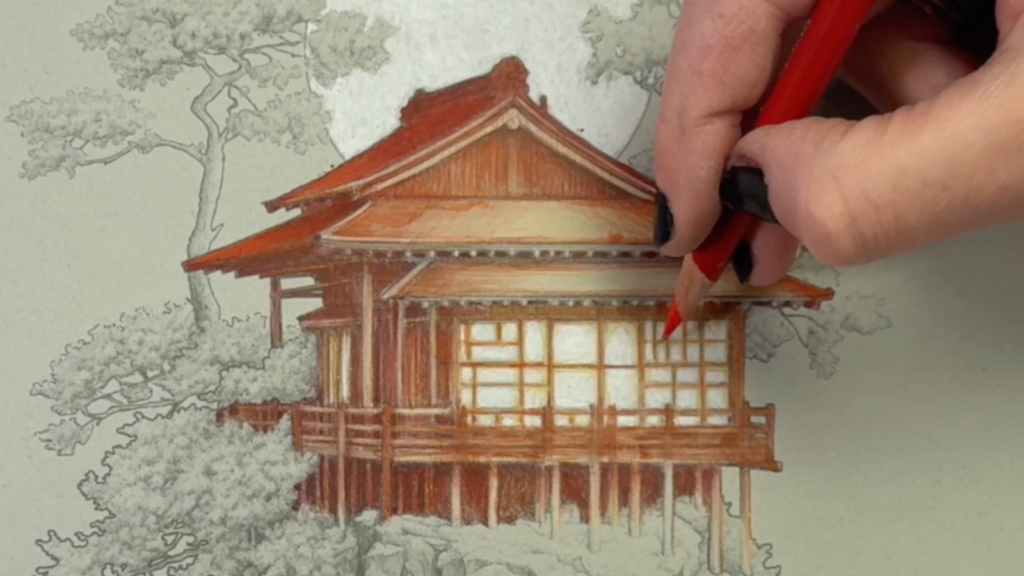
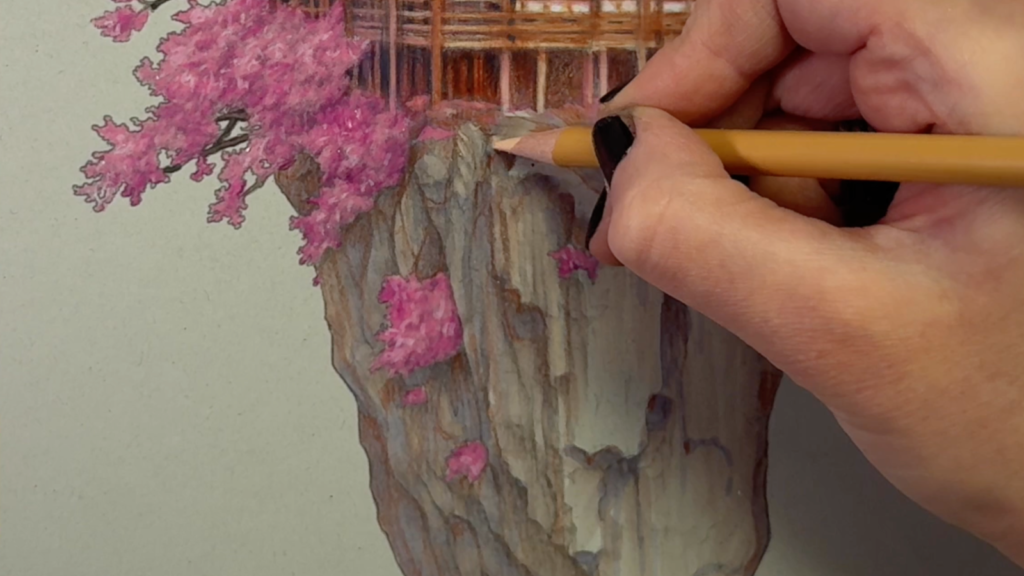
A single fantasy scene from white primer to moon glow. Lisa walks you through coloring a cherry tree house dreamscape, covering wood effects, sunshine lighting, red roofs, cherry blossom pink, canopy shadows and highlights, and a glowing moon. You will also learn how to use brush markers for speed alongside colored pencils.
This is a focused, follow-along project that teaches you how to build atmosphere and mood into a fantasy illustration.
After this course, you will...
- Prime and set the mood for a fantasy scene
- Render convincing wood effects and architectural details
- Create sunshine lighting with warm shadows and cool highlights
- Color cherry blossoms with realistic canopy depth
- Use brush markers alongside colored pencils for speed and coverage
- Finish with atmospheric moon glow effects
What's inside
- Starting With White Primer
- Setting The Mood
- Wood Effects
- Adding Sunshine
- Red Roof
- Best Shadow Colors
- Cherry Blossom Pink ▶ Preview
- Canopy Shadows
- Canopy Highlights
- Brush Markers For Speed
- Detail Work
- Moon Glow
This course is included with an Artisan Membership
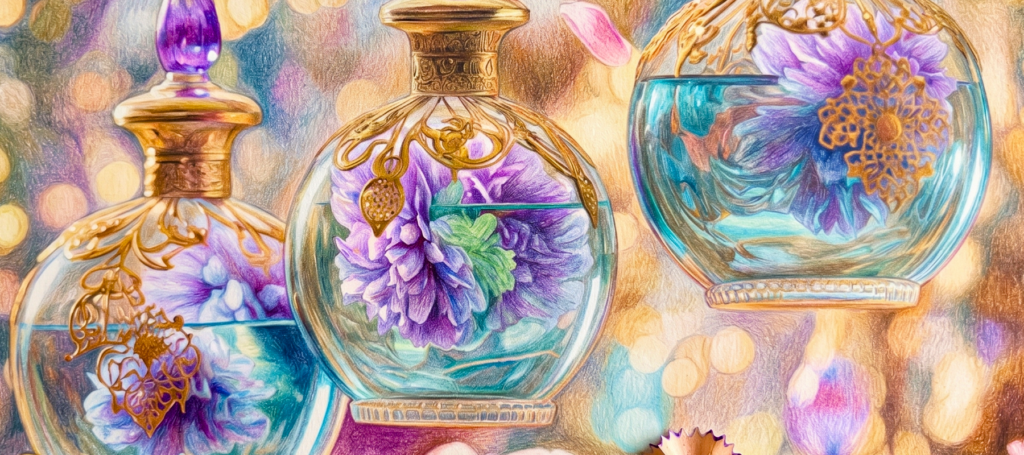
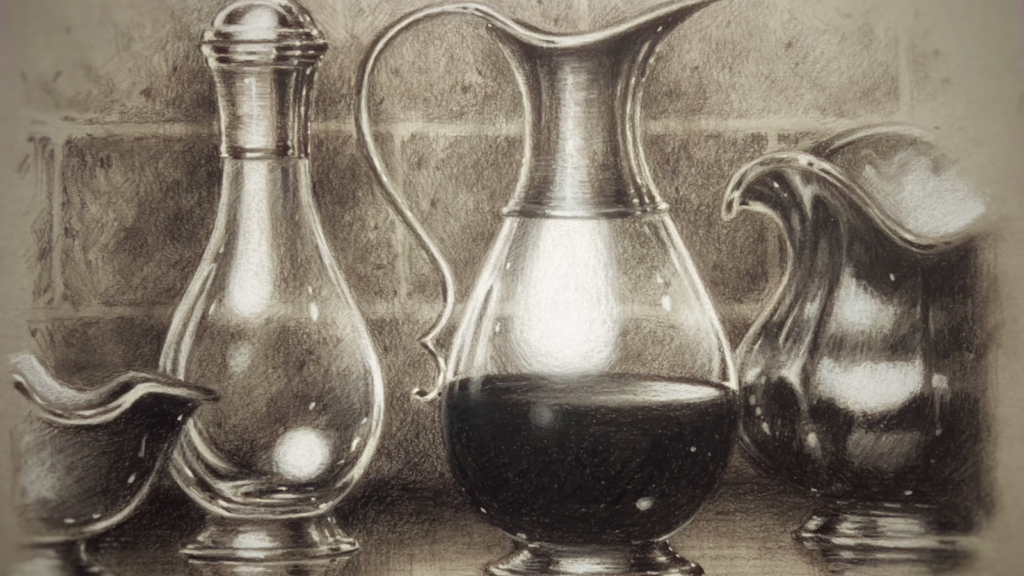
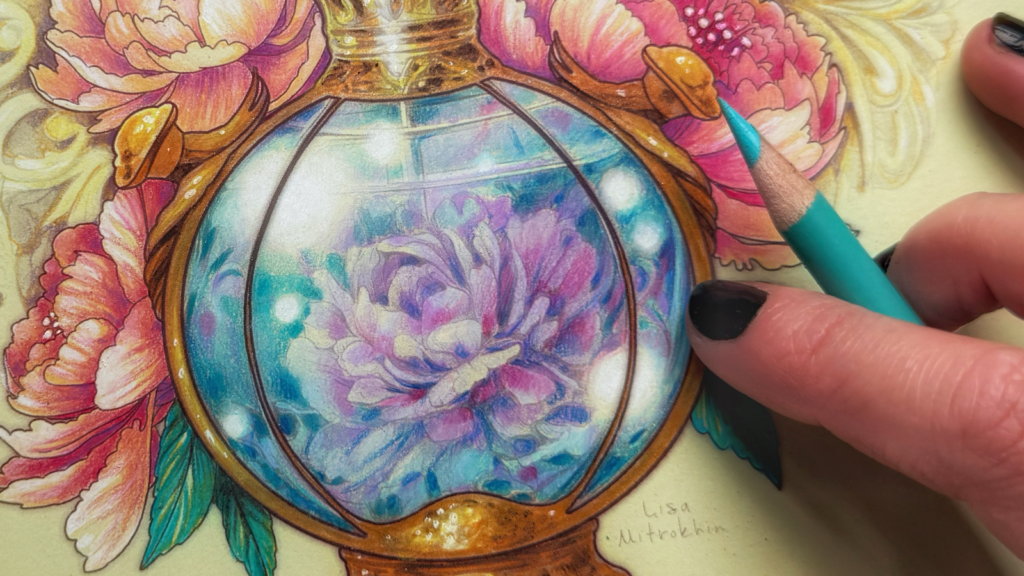
A short, meditative coloring course that combines art with mindfulness. Lisa guides you through a series of calming projects including mandalas, crystals, delicate flowers, glass potions, and golden details. Each lesson is designed to be relaxing and centering while still teaching real colored pencil technique.
This is a great entry point if you want to pick up colored pencils without pressure, or a nice reset between more intensive courses.
After this course, you will...
- Use coloring as a calming, centering practice
- Color mandalas, crystals, flowers, and glass with intention
- Build foundational colored pencil technique through relaxed practice
- Add golden details and final touches to finished pieces

What's inside
- The Journey Begins
- Light And Hope
- Sunshine Mandala
- Crystalline Power ▶ Preview
- Delicate Flowers
- Glass And Potions
- Golden Advice
- Final Details
- A Moment of Reflection
This course is included with an Artisan Membership

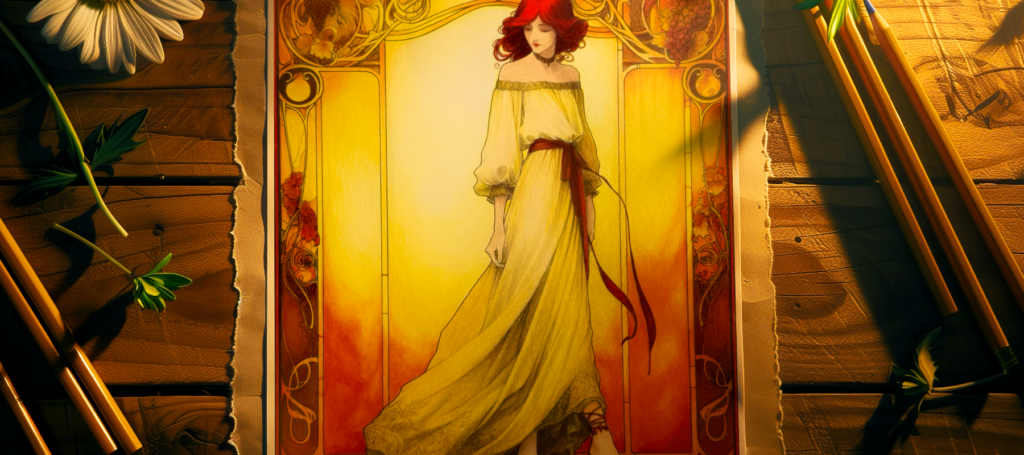
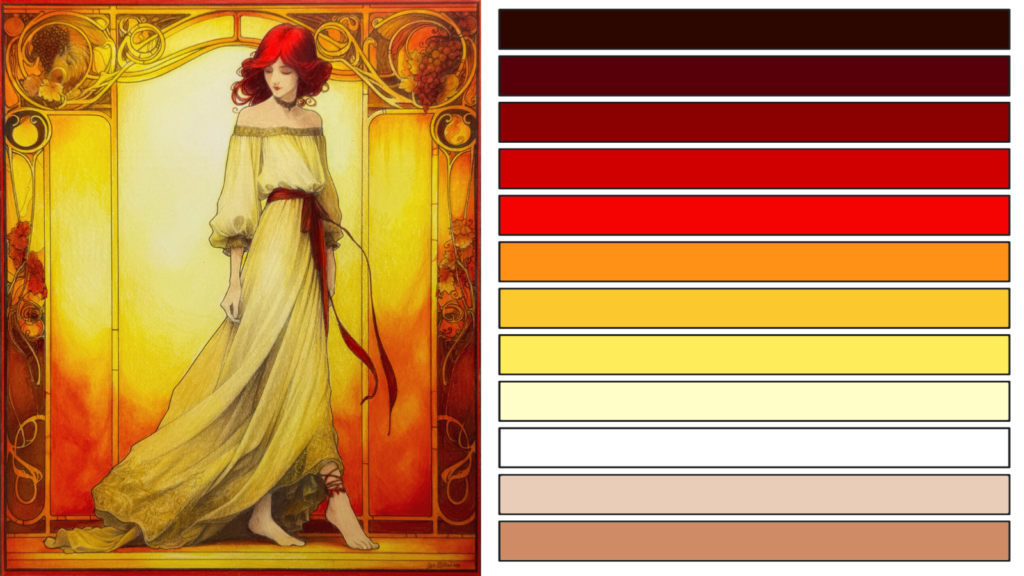
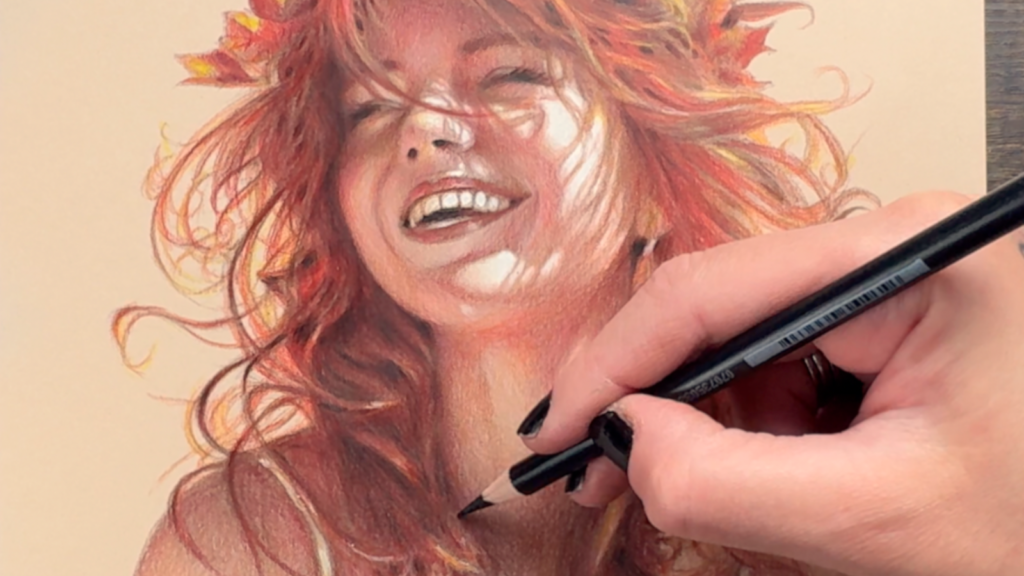
Colored pencils can produce results that look like paintings. This course teaches you how. Lisa walks you through a complete portrait, starting with paper and primer, building an underpainting, layering greyscale and color, blending warm and cool tones, and finishing with sunlight color, highlights, and high contrast. Every step is designed to produce a painterly result rather than a typical colored pencil look.
You will learn to work with references, create believable illusions of depth, and render red hair and skin with rich, layered color.
After this course, you will...
- Build an underpainting foundation with proper paper and primer
- Layer greyscale and color for painterly depth
- Blend warm and cool tones for realistic skin
- Create believable illusions and work from reference photos
- Finish with sunlight color, highlights, and high contrast for a painted look
What's inside
- About This Course
- Paper And Primer
- Starting The Underpainting
- Shading Techniques
- Coloring Over Greyscale
- Warm And Cool Colors
- Capturing Moments In Time
- Blending And Blush
- Burgundy Infusion ▶ Preview
- Creating Believable Illusions
- Working With References
- Tricks For Red Hair
- Getting Feedback
- Adding Sunlight Color
- Strawberry Red
- Light Highlights
- High Contrast
This course is included with an Artisan Membership
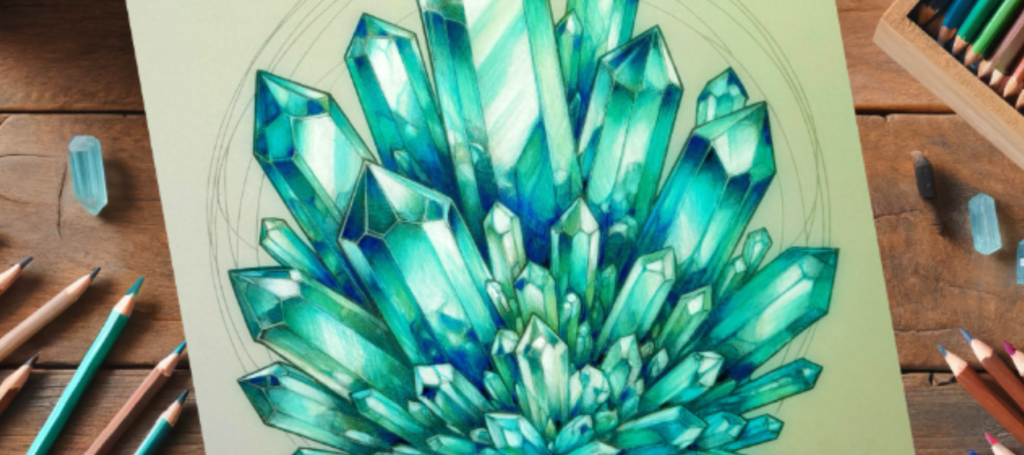
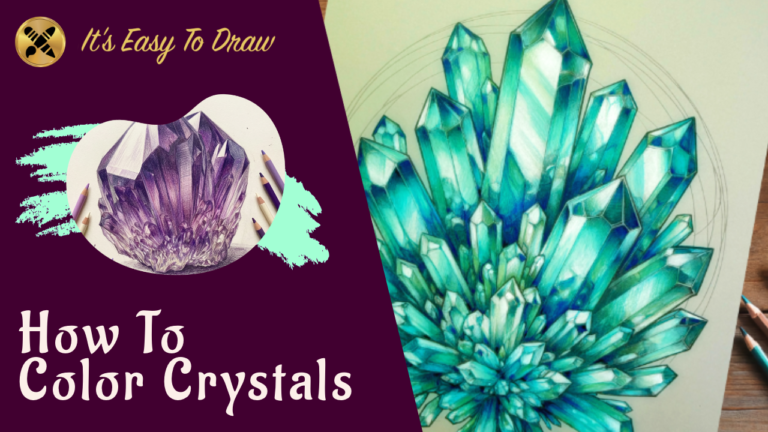
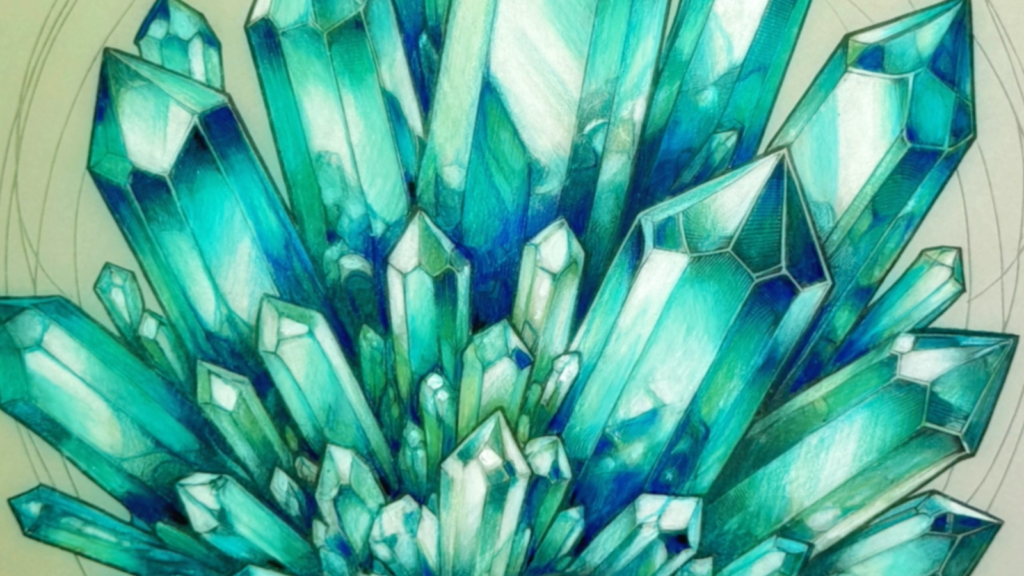
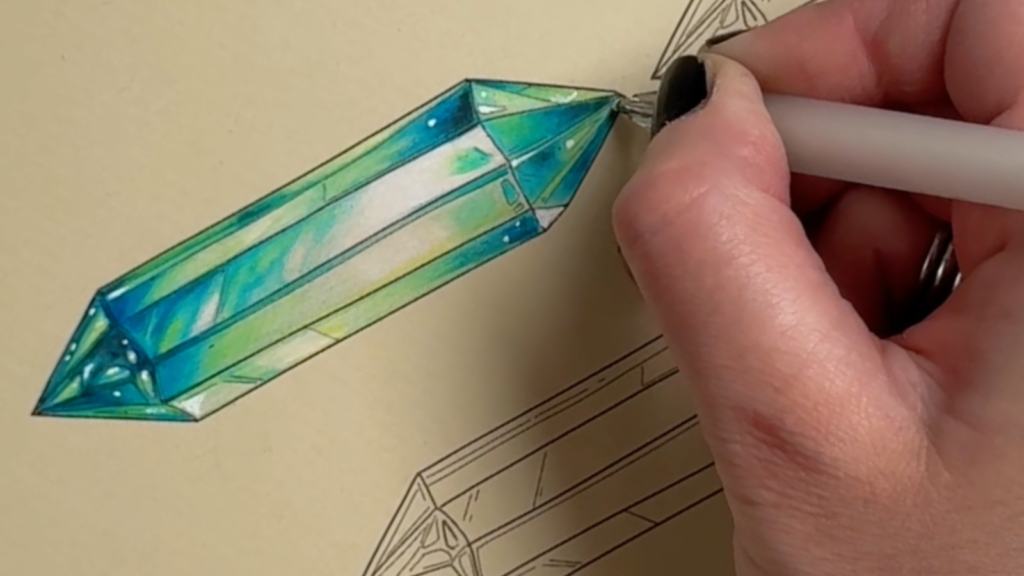
Crystals are all about light, transparency, and sharp facets. This course starts with individual crystal practice on both white and toned paper, then moves into a large crystal cluster project where you bring everything together. Lisa covers high contrast crystals, pale crystals, vibrant crystals, and colorful crystals, then teaches you priming, color layering, blending, glossy effects, and glimmer.
The course includes crystal color charts and a final project where you complete a full crystal cluster illustration.
After this course, you will...
- Draw high contrast, pale, vibrant, and colorful crystals
- Work on both white and toned paper for different crystal effects
- Prime, layer, and blend for glossy crystal surfaces
- Add glimmer and shine effects to finished crystals
- Complete a full crystal cluster illustration

What's inside
- High Contrast Crystal On White Paper
- Pale Crystal On White Paper
- Vibrant Crystal On White Paper
- Colorful Crystal On Toned Paper
- Chapter 1 Homework
- Priming The Subject
- The Main Color Layer
- Blending With A Lighter Color ▶ Preview
- Stronger Color Infusion
- Glossy Effect Blending
- Glimmer And Shine Effects
- Crystal Color Charts
- Final Project
This course is included with an Artisan Membership
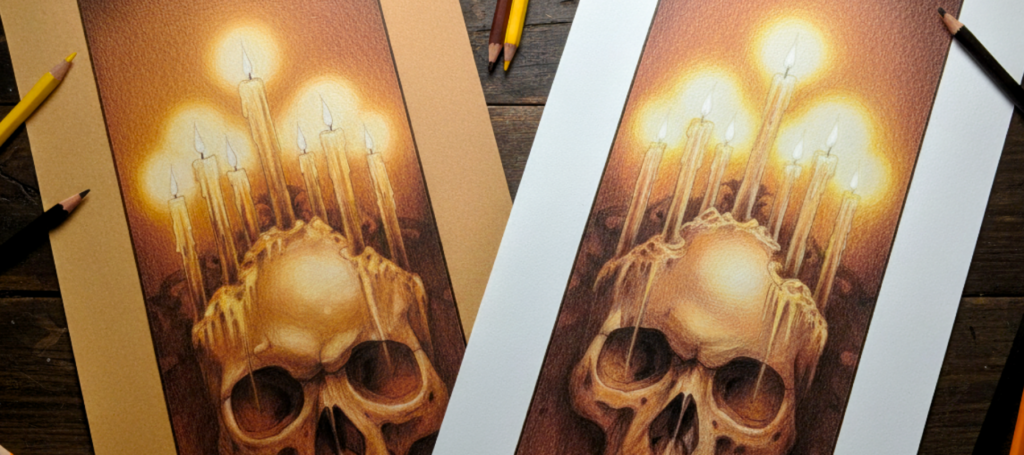
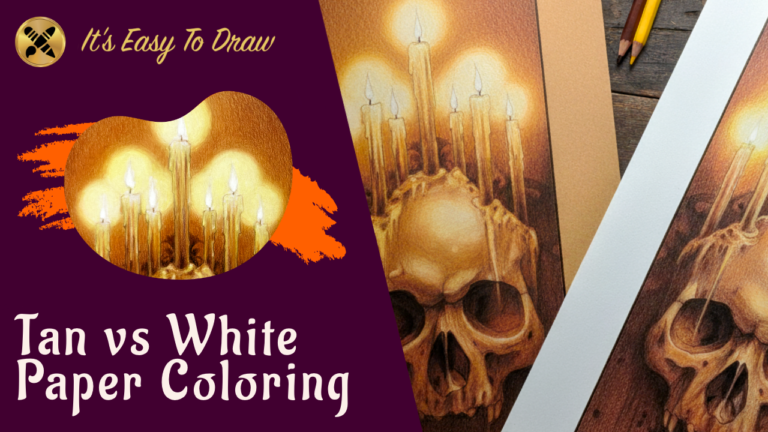
Two pieces, two papers, one experiment. Lisa colors the same artwork twice, side by side, so you can watch exactly what tan paper gives you that white can’t, where white wins back ground tan can’t reach, and how the same color reads differently on each surface.
This is a watch-along study, not a narrated tutorial. Every layer goes down on both papers in real time, with the comparison built into every frame. By the last lesson, you’ll know which paper to reach for before you start a project, and why.
After this course, you will...
- See exactly when tan paper outperforms white, and the moments white wins back
- Predict how layering, shading, and contrast behave on either surface
- Build warm color moods using paper tone as a built-in foundation
- Match shadow depth and atmospheric glow across two different papers
- Balance fine detail without overworking either surface
- Choose the right paper for any project before lifting a pencil

What's inside
- The Experiment
- White On Tan
- A Color Investment
- Just Keep Shading, Just Keep Shading…
- The Price Of Working On White
- More Definition And Body
- Contrast Is Brutal
- Warm Color Moods
- Instant Glow Effect
- Catching Up With Brightness
- Still Playing Catch Up
- In Or Out Of Focus?
- Competing With Paper Color
- White On White?
- Nearly Balanced
- Matching The Warm Yellow Glow
- Building Up Shadows
- Gloomy Sfumato
- Consistent Shadows
- Sharper Detail
- Still Longer On White
- Don't Neglect Black
- Fine Detail Control
- Too Much Or Too Little Detail?
- A Balancing Act
- Lighting Up The Flames
- And The Verdict Is …
This course is included with an Artisan Membership
See something you want to learn?
Every course comes with Lisa’s step-by-step guidance. Pick a membership and start today.
View Membership Plans